Minder 3D
Official product manual

Make anything.
Know every tool.

Beginner-friendly, source-verified guides for the tools that are implemented in Minder 3D 1.0 Beta.

Getting Started

Getting Started

Know what is on screen, move around safely, and save before you build.

Getting Started

Interface overview

#

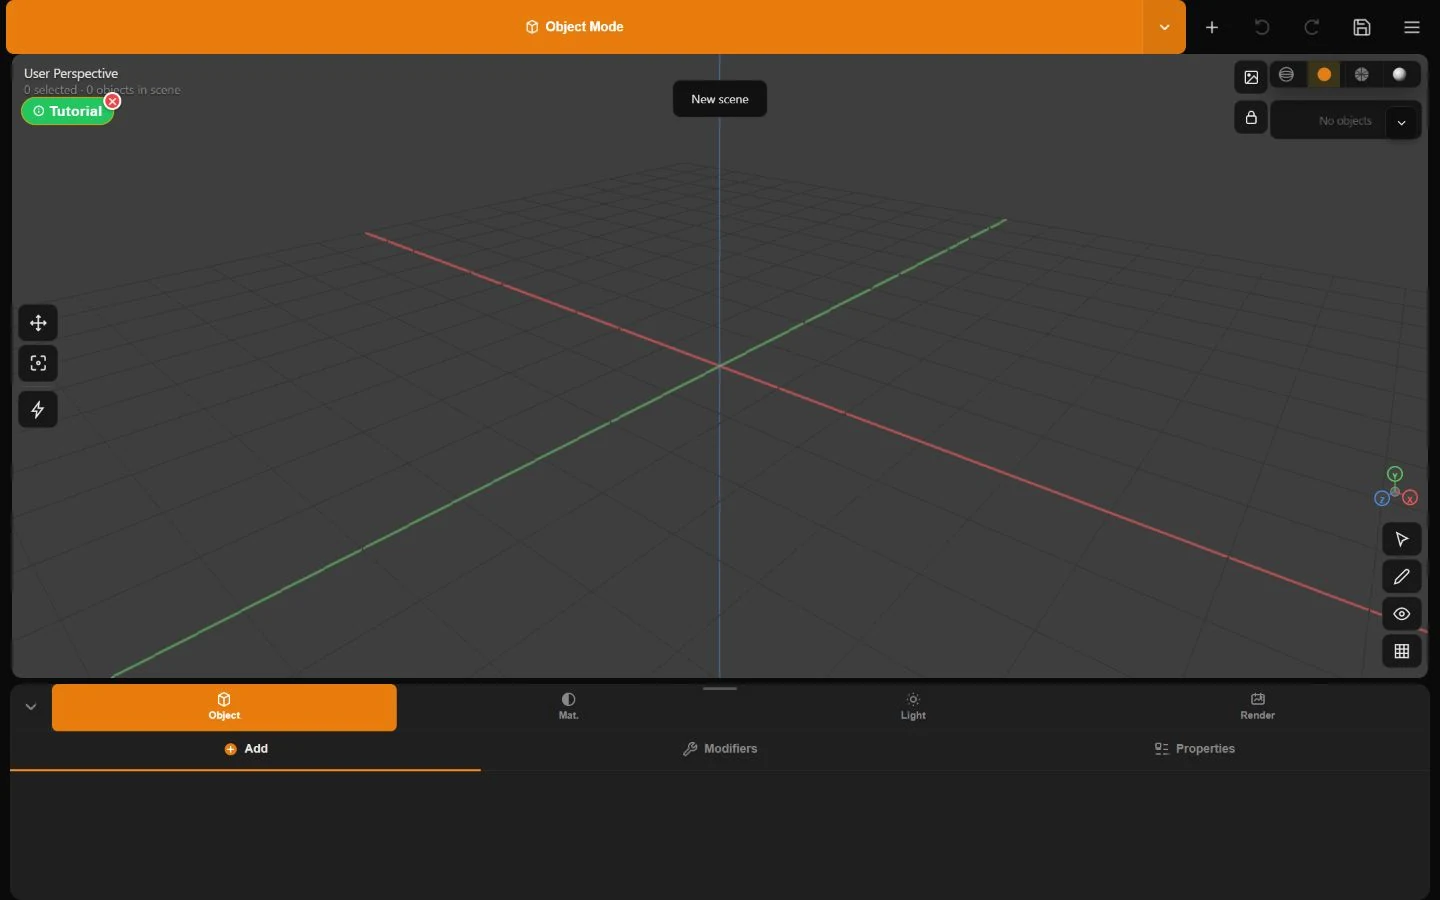
What it does. Minder is a touch-first 3D workspace. The viewport is central; creation and transform tools sit around it; the Outliner and property tabs expose scene and object settings.

The real Minder 3D workspace with its viewport, toolbar, Outliner, shading controls, and property panel
Captured in Minder 3DThe Minder 3D workspace, captured from the running 1.0 Beta app.

How to use

  1. Open Minder Web and wait for the viewport to finish loading.
  2. Use the mode control at the top to switch Object, Edit, Texture Paint, Sculpt, Animation, or Pose workflows.
  3. Select an object before opening properties that act on a mesh.

Controls

  • Top bar: mode, Add, Undo, Redo, Save, and File menu.
  • Left tools: Select, Move, Rotate, Scale, Frame All, and context actions.
  • Property tabs: Object, Edit, UV, Material, Animation, Texture, Light, and Render.
  • Outliner: selects and organizes scene objects.

Example workflow

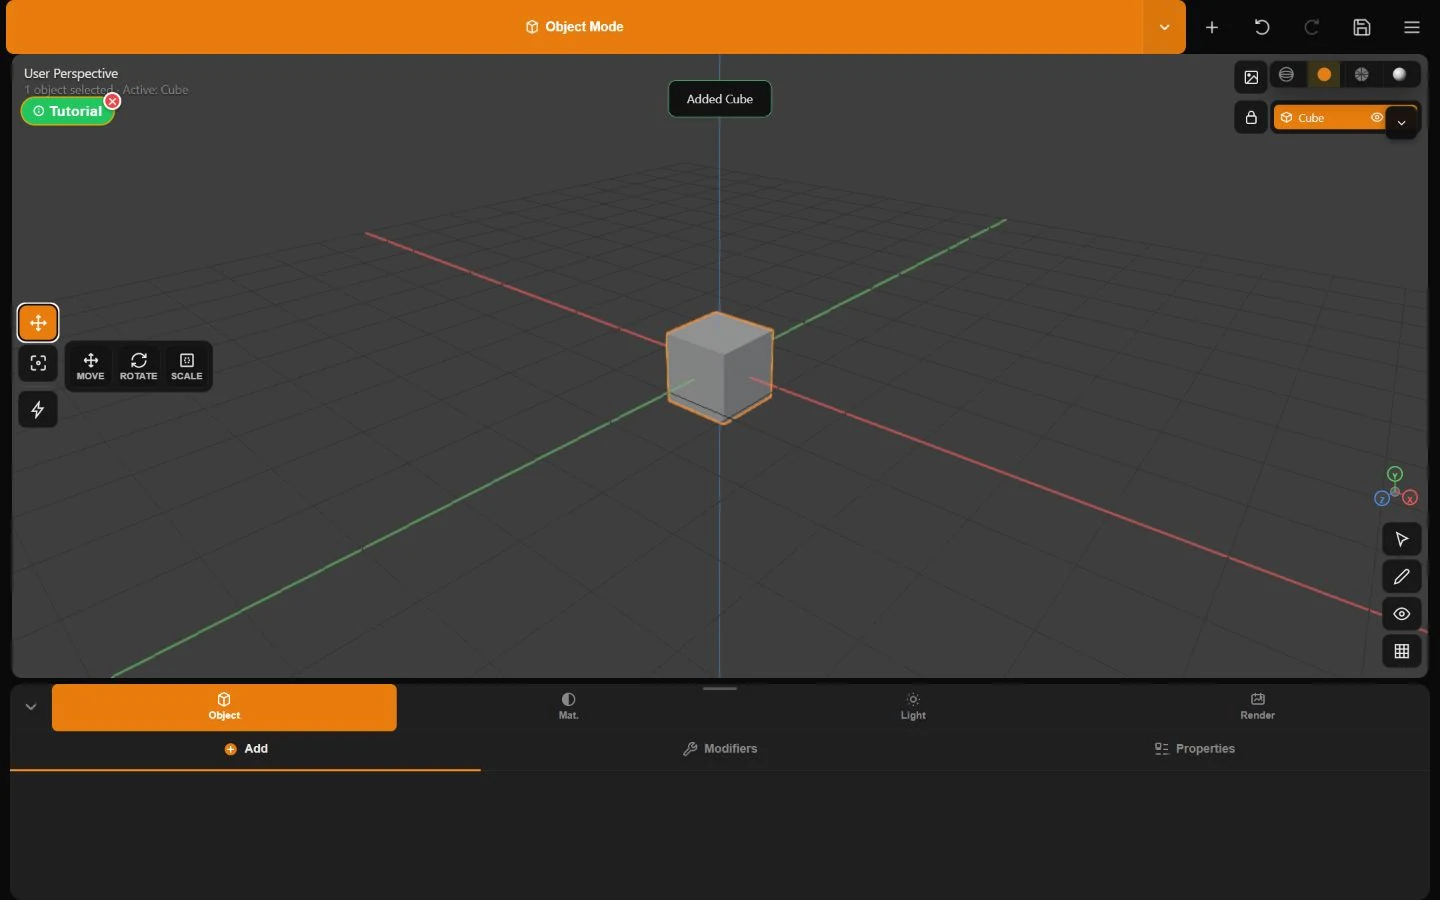
  1. Add a Cube.
  2. Tap it in the viewport or Outliner.
  3. Open Object properties, rename it, then Save As a .minder3d project.

Tips

  • If a panel looks empty, select a compatible object first.
  • Use the orange Confirm and Cancel controls while a modeling tool session is active.

Common problems

  • A control is disabled: the current mode, selection type, or object does not support it.
  • The viewport is slow: lower Render Quality or switch from Rendered to Solid.
Getting Started

Viewport navigation

#

What it does. Orbit, pan, zoom, frame the scene, and snap to standard views without changing your objects.

How to use

  1. Drag empty viewport space to orbit.
  2. Use two fingers to dolly and pan on touch.
  3. Use Frame All when the scene is lost, or tap the axis gizmo for an exact view.

Controls

  • Mouse: left-drag orbit, middle wheel/dolly, right-drag pan.
  • Alt + left-drag pans; Alt + Shift + left-drag rotates the studio environment.
  • Axis gizmo: tap an axis for its primary view, double-tap for the opposite view, tap the center for perspective.
  • View buttons: Front, Back, Left, Right, and Top.
  • View Lock freezes the confirmed angle; hold it to access saved views.

Example workflow

  1. Select a model.
  2. Tap Front, then Frame All.
  3. Save that view; orbit away and tap its saved-view button to return.

Tips

  • Navigation changes the editor view, not the object transform.
  • Unlock the 3D view before trying to pan.

Common problems

  • Nothing moves while dragging: View Lock may be enabled.
  • You sculpt or paint accidentally: start navigation on empty space or use the documented right-drag/two-finger gesture for that mode.

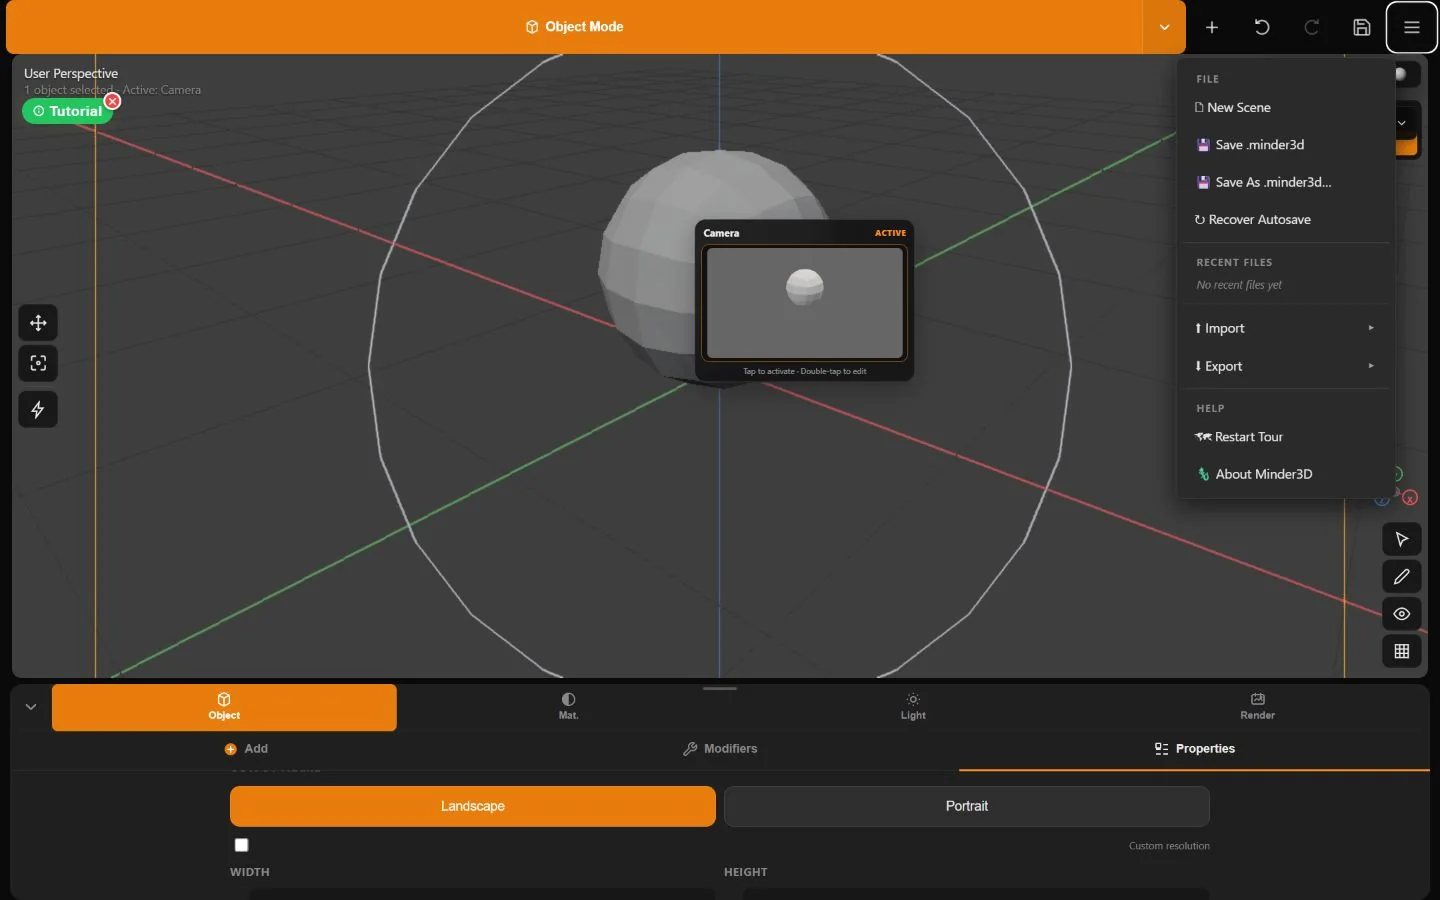
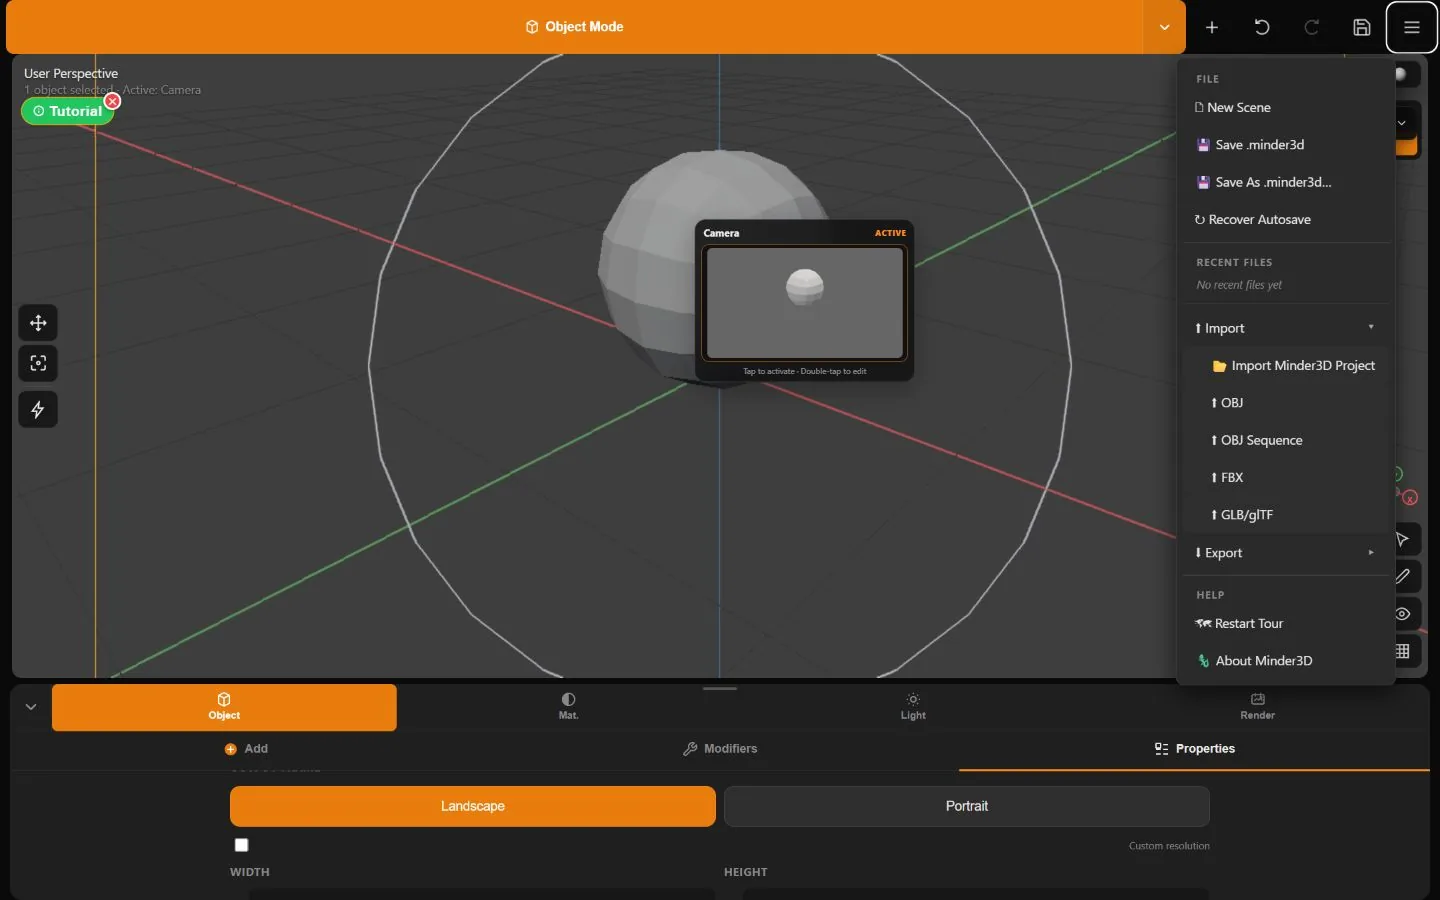
What it does. The native .minder3d file preserves the editable scene. Legacy .mender files remain importable.

The Minder File menu with New Scene, Save, Save As, autosave recovery, import, export, and help
Captured in Minder 3DThe real File menu keeps native project saving separate from exchange formats.

How to use

  1. Open the File menu.
  2. Choose Save or Save As .minder3d.
  3. To resume, choose Import Minder3D Project and select a .minder3d or legacy .mender file.

Controls

  • Save updates the current file when the browser grants a file handle.
  • Save As chooses a new name and location.
  • Recent local projects may appear on the start screen when their stored JSON is under the app’s local-size threshold.

Example workflow

  1. Name the project donut-study.
  2. Save as donut-study.minder3d.
  3. Export a GLB separately for sharing, while keeping the .minder3d file as the editable master.

Tips

  • Save before applying destructive modifiers or importing a replacement scene.
  • A PNG is an image, not an editable project.

Common problems

  • ‘Not a valid Minder3D project’: the JSON format marker or object data is invalid.
  • A large project may not appear in local Recents; open its saved file directly.
Getting Started

Modes and undo

#

What it does. Modes change what taps and tools affect. Undo/Redo keeps up to 64 snapshot-based steps for supported edits.

How to use

  1. Tap the current mode or its arrow.
  2. Choose the workflow that matches the task.
  3. Leave special modes before selecting an unrelated object when prompted.

Controls

  • Object: whole objects and transforms.
  • Edit: vertices, edges, and faces.
  • Texture Paint: pixels on the active texture.
  • Sculpt: vertices through brushes.
  • Animation/Pose: clips, keys, and bones.
  • Undo and Redo are in the top bar.

Example workflow

  1. Add a Cube in Object Mode.
  2. Enter Edit Mode and extrude a face.
  3. Undo once to remove the extrusion without deleting the cube.

Tips

  • Confirm or cancel a live tool session before switching modes.
  • Mode-specific controls intentionally disappear when the active selection is incompatible.
Selection

Selection

Selection defines exactly what the next operation changes.

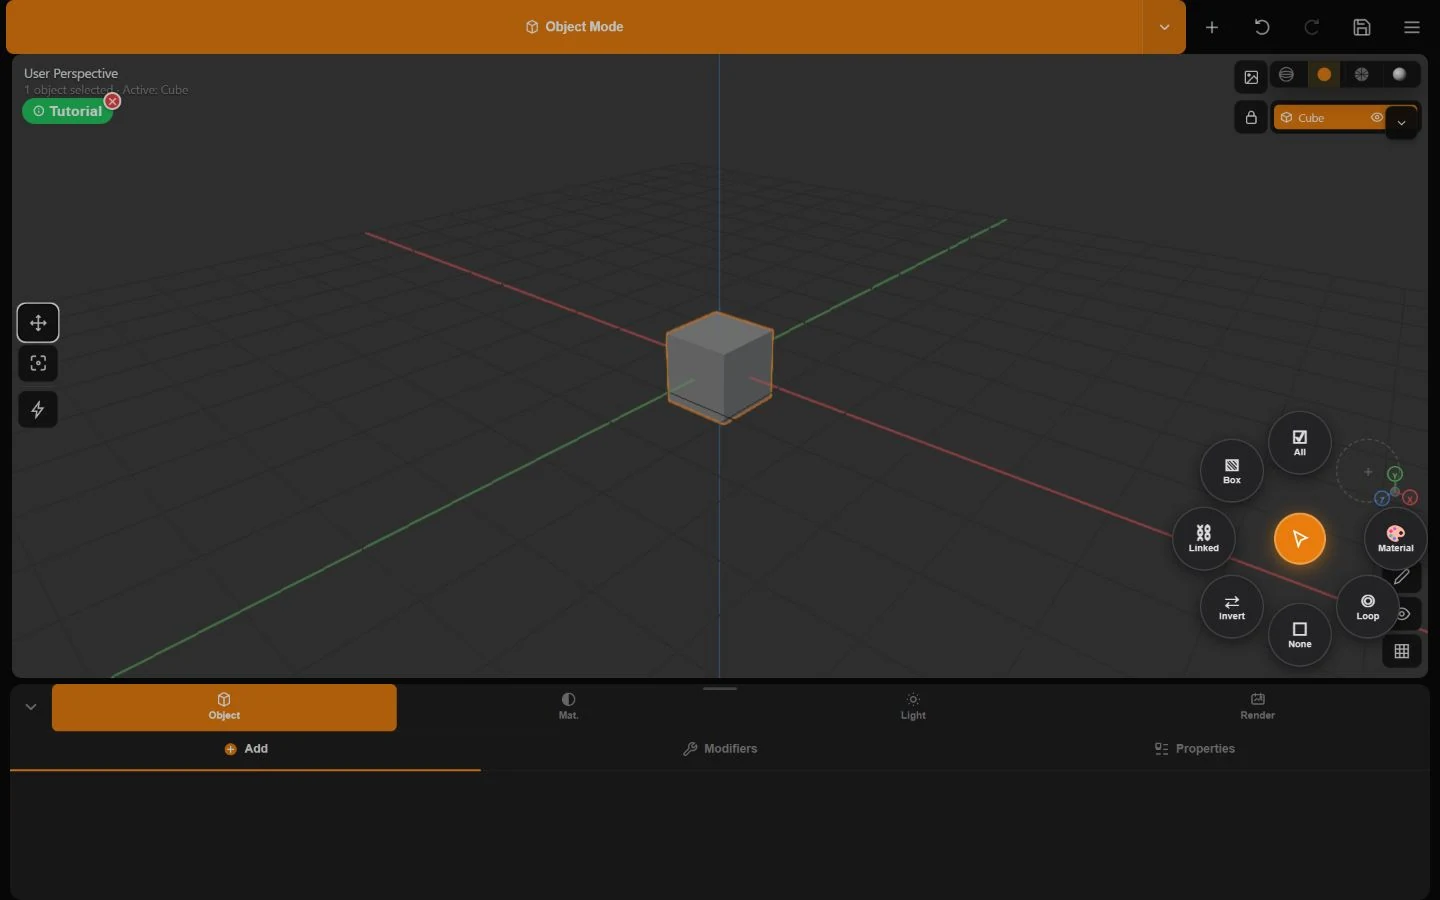
What it does. A normal tap replaces selection. Multi-Select changes taps into add/remove operations.

Minder Selection menu showing All, None, Linked, Material, Invert, Loop, and Box
Captured in Minder 3DThe selection menu changes what the next modeling action affects.

How to use

  1. Choose Select and tap an object or an edit element.
  2. Tap empty space to clear selection.
  3. Hold the Select tool to toggle Multi-Select, then tap items to add or remove.

Controls

  • Tap Select: opens the selection pie.
  • Double-tap Select: Select All.
  • Hold Select: Multi-Select on/off.
  • Selection pie: All, None, Invert, Linked, Material, Loop, and Box Select where applicable.

Example workflow

  1. Enter Face selection.
  2. Tap one face, hold Select to enable Multi-Select, then tap two more faces.
  3. Run Inset with Individual enabled to inset each face separately.

Tips

  • The active object drives property panels even when several objects are selected.
  • Tap empty space once to leave Multi-Select and clear selection.

Common problems

  • Taps keep replacing faces: enable Multi-Select.
  • A selection command reports ‘Tap a face/edge first’: make one seed selection before Linked or Loop.

What it does. Expand a selection by screen region, mesh connectivity, edge flow, or material assignment.

How to use

  1. Open the Select pie and arm Box Select, then drag a rectangle.
  2. Double-tap a face for its linked island or an edge for its edge loop.
  3. Use Linked, Loop, or Material from the selection pie after choosing a seed.

Controls

  • Edit long-press + drag also starts box selection.
  • Box Select works in Object and Edit modes.
  • Linked follows connected topology; Material selects faces that use the same material slot; Loop follows valid edge-loop continuity.

Example workflow

  1. Select one edge on a quad-based cylinder.
  2. Double-tap it to select the loop.
  3. Use Mark Seam, then Unwrap in the UV tab.

Tips

  • Loops are most predictable on clean quad topology.
  • Use Invert after a broad selection when the smaller remainder is easier to describe.

Common problems

  • Loop stops early: poles, triangles, boundaries, or broken topology interrupt the flow.
  • Box Select grabs unexpected elements: change Vertex/Edge/Face type first.
Transform

Transform

Position, orient, and size objects or selected mesh elements with explicit coordinate and pivot rules.

What it does. The transform gizmo constrains edits to an axis; gestures can also operate in the view plane or uniformly.

Minder transform toolbar showing Move, Rotate, and Scale beside the active model
Captured in Minder 3DMove, Rotate, and Scale are grouped in the left transform rail.

How to use

  1. Select an object or edit elements.
  2. Choose Move, Rotate, or Scale.
  3. Drag near X, Y, or Z on the gizmo; confirm the result when a tool session requests it.

Controls

  • Move: axis drag; two fingers move in the view plane.
  • Rotate: circular axis drag.
  • Scale: axis drag; pinch for uniform scale.
  • Coordinate space: Global, Local, View, or Normal.
  • Pivot: Center, Individual, or Active.
  • Mirror bar: local X, Y, and Z.

Example workflow

  1. Select three faces.
  2. Choose Normal coordinates and Individual pivot.
  3. Scale inward so every face moves along its own local basis.

Tips

  • Global follows the scene axes; Local follows the object; Normal is especially useful for faces.
  • Reset scale to one before workflows that depend on predictable dimensions.

Common problems

  • The gizmo is absent: select a transformable object/element and leave Select-only tools.
  • Movement feels diagonal: check the coordinate space and camera view.

What it does. Object and Edit actions create copies, remove data, split selected faces, merge selected vertices, or recenter the mesh origin.

How to use

  1. Select the target.
  2. Open Actions or the Edit tool menu.
  3. Choose Duplicate, Delete, Separate Selection, Merge Verts, Merge by Distance, or Center Origin as needed.

Controls

  • Duplicate preserves the source and selects a copy.
  • Separate Selection builds a new object from chosen faces.
  • Merge Verts collapses selected vertices; Merge by Distance uses a distance threshold.
  • Center Origin recenters mesh geometry around the object transform.

Example workflow

  1. In Edit Mode select a group of faces.
  2. Separate them into a new object.
  3. Return to Object Mode and move the new object aside.

Tips

  • Save before deleting complex selections.
  • Use Merge by Distance after imports only with a small threshold to avoid collapsing intended detail.

Common problems

  • Separate does nothing: select faces that form valid geometry.
  • Merge Verts is unavailable: switch to vertex selection and choose at least two vertices.
Modeling

Modeling

Create primitives, then refine their topology in Edit Mode.

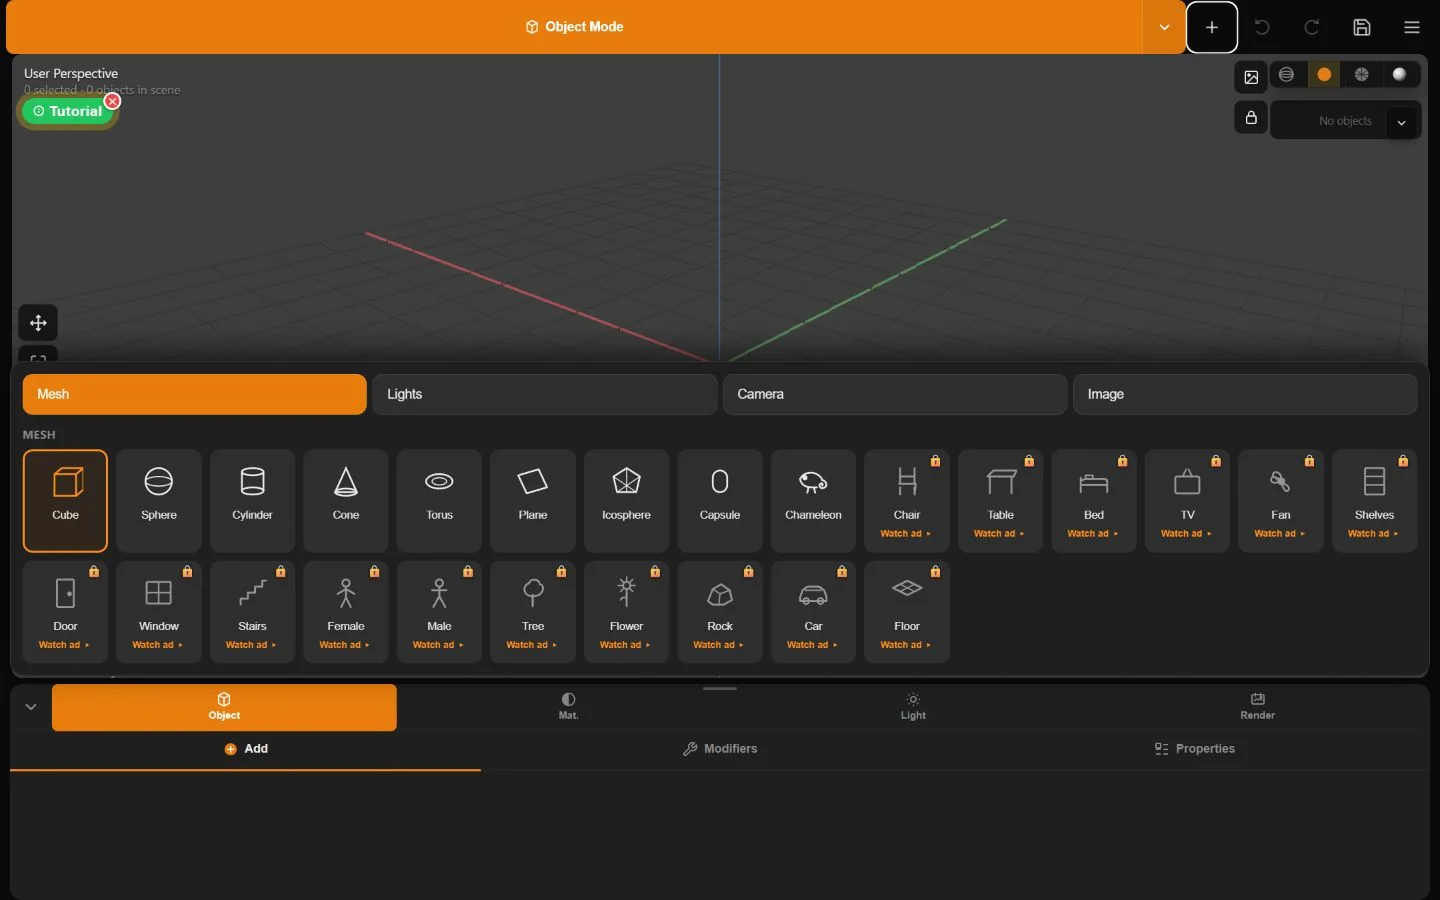
What it does. The Add menu creates scene content. Built-in mesh primitives become editable geometry.

The real Minder Add menu showing mesh primitives, Camera, Image, Lights, and model library items
Captured in Minder 3DThe Add menu, with implemented primitives and clearly marked locked library assets.

How to use

  1. Tap Add.
  2. Choose a primitive or scene object.
  3. Place and scale it with the transform gizmo.

Controls

  • Available creation groups include mesh primitives, Camera, Image, and scene lights.
  • Torus exposes a last-operation panel for Major Radius and Minor Radius.
  • Image accepts PNG, JPG, or WebP and creates an image plane.

Example workflow

  1. Add a Torus.
  2. Adjust its major and minor radius before leaving the last-operation panel.
  3. Add a Camera and set it active for final output.

Tips

  • Name objects early so the Outliner and light/camera target menus stay understandable.
  • Use Frame All after adding content outside the current view.

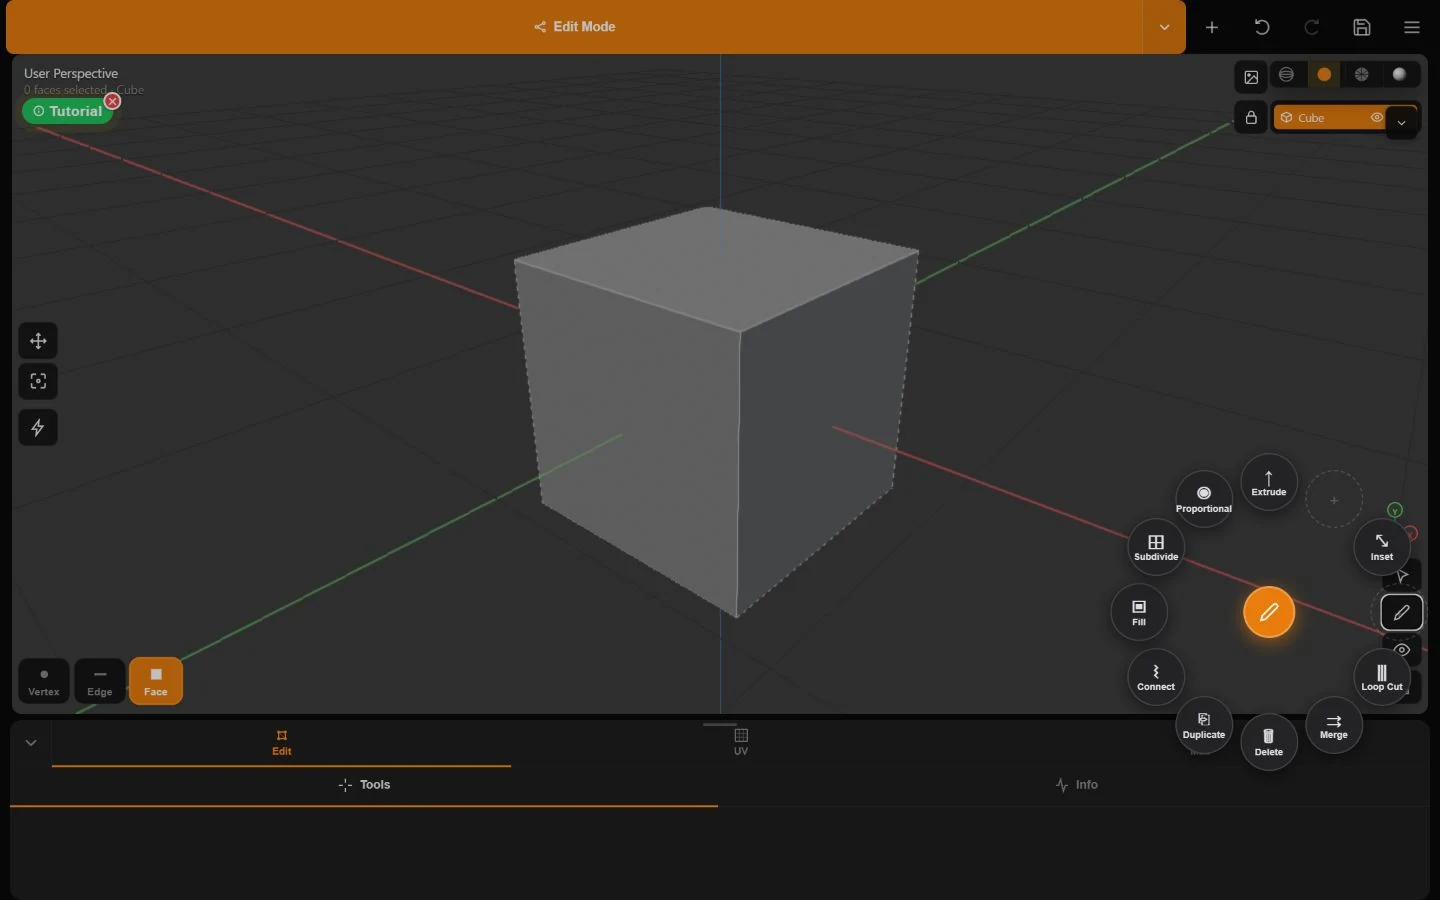
What it does. Edit Mode exposes the underlying mesh and lets selection-sensitive operations change topology.

Minder Edit Mode showing Vertex, Edge, Face and modeling operations such as Extrude, Inset, Loop Cut, Merge, Connect, Fill, and Subdivide
Captured in Minder 3DEdit Mode exposes only the operations implemented for mesh editing.

How to use

  1. Select a mesh and enter Edit Mode.
  2. Choose Vertex, Edge, or Face.
  3. Select elements and launch a modeling operation from the Edit tool menu.

Controls

  • Vertex: points; Edge: connections; Face: surfaces.
  • Select All, Deselect, Invert, Linked, Loop, Material, and Box refine the working set.
  • Delete removes the currently selected element type.

Example workflow

  1. Add a Cube and enter Edit Mode.
  2. Choose Face, select the top, and Extrude it.
  3. Switch to Edge and bevel or loop-select supporting edges.

Tips

  • Keep topology simple while learning.
  • Exit Edit Mode before moving a whole object.

Common problems

  • Edit Mode will not start: select an editable mesh, not a camera, light, or image helper.

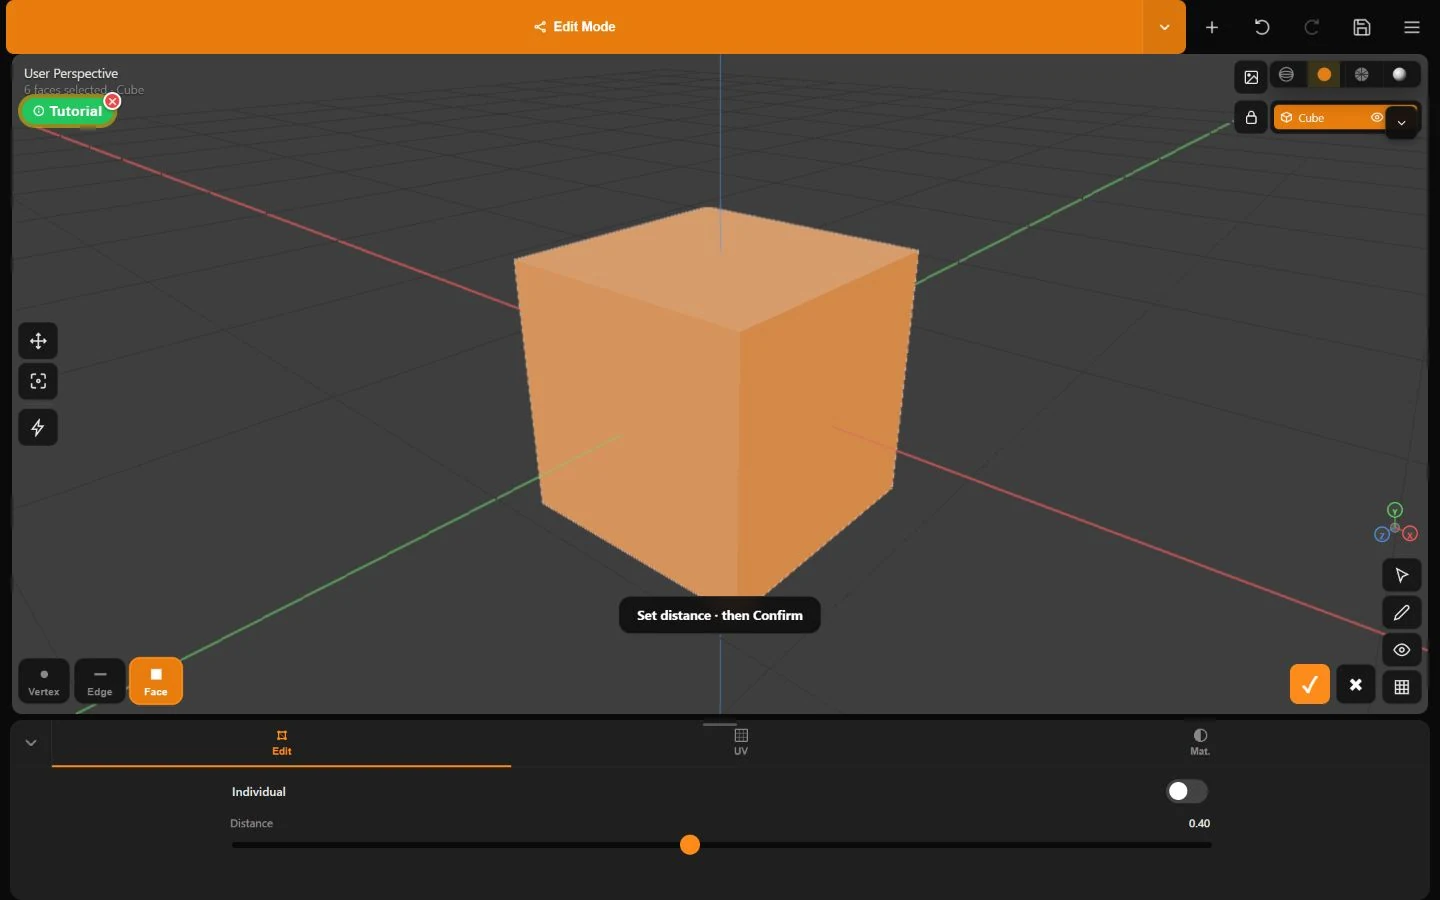
What it does. These core operations add or remove topology from the active edit selection.

A live Minder Extrude operation with selected cube faces, Distance slider, Individual switch, Confirm and Cancel
Captured in Minder 3DA real Extrude session: selected faces remain visible while Distance and Individual are adjusted.

How to use

  1. Select one or more faces.
  2. Choose Extrude or Inset.
  3. Adjust Distance/Amount; use Individual for separate faces; confirm or cancel.

Controls

  • Extrude default distance: 0.4.
  • Inset default amount: 0.3.
  • Individual applies per face instead of as one region.
  • Subdivide adds detail to selected topology.
  • Delete removes the chosen vertices, edges, or faces.

Example workflow

  1. Select the top face of a cube.
  2. Inset to form a border.
  3. Extrude the inset face upward, then subdivide where more detail is needed.

Tips

  • Extrude a small amount first; refine with transform controls.
  • Subdivision increases geometry cost, especially before Sculpt.

Common problems

  • Unexpected holes after Delete: undo and verify the selected element type.
  • Individual produces separate islands by design; turn it off for a connected region.

What it does. Loop Cut adds one or more loops across compatible quads; Connect joins selected vertices; Fill creates a face from a valid boundary.

How to use

  1. For Loop Cut, choose an edge on a quad flow, set Count, slide horizontally, then confirm.
  2. For Connect, select suitable vertices and run Connect.
  3. For Fill, select a closed boundary and run Fill Face.

Controls

  • Loop Cut default Count: 1.
  • Horizontal drag controls the slide position.
  • Cancel removes the preview without changing topology.

Example workflow

  1. On a cube, start Loop Cut on a vertical edge.
  2. Set two cuts and confirm near the center.
  3. Select boundary vertices around a simple hole and Fill.

Tips

  • Loop Cut follows quad rings; start on a clear, non-pole edge.
  • Inspect the result in wireframe before continuing.

Common problems

  • No loop preview: the edge may not belong to a valid quad ring.
  • Fill fails or twists: ensure the boundary is valid and ordered without duplicate vertices.

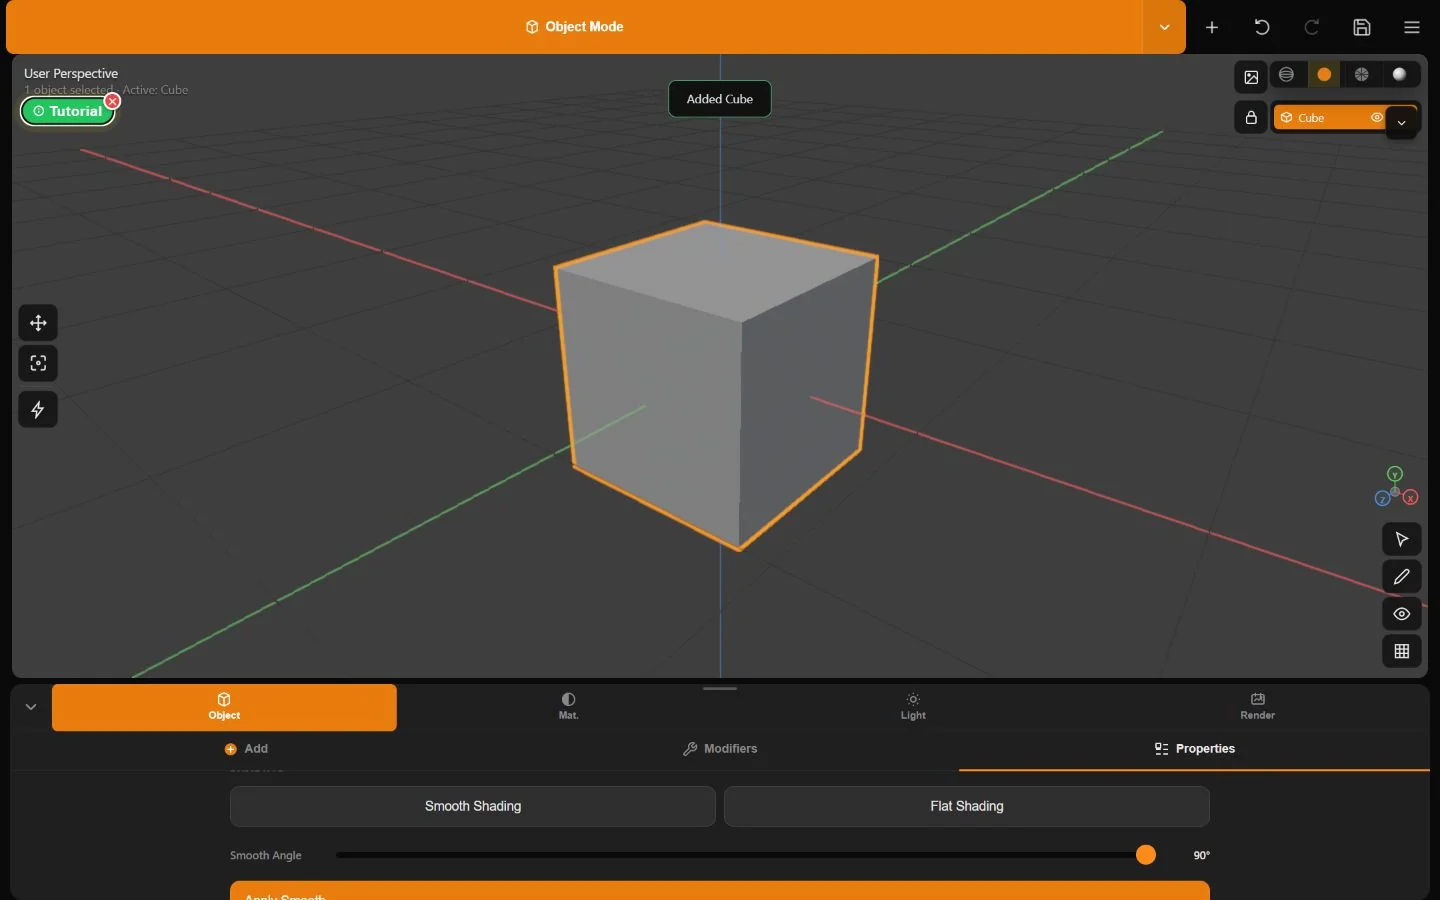
What it does. Shading commands change how mesh normals interpolate without changing the silhouette.

How to use

  1. Select a mesh.
  2. Open object/create properties.
  3. Choose Smooth, Flat, or Auto Smooth and set an angle.

Controls

  • Smooth interpolates vertex normals.
  • Flat keeps a faceted look.
  • Auto Smooth keeps edges sharper when their angle exceeds the chosen threshold.

Example workflow

  1. Add a low-poly sphere.
  2. Compare Flat and Smooth.
  3. Use Auto Smooth when you want curved areas plus intentional hard edges.

Tips

  • Shading is not the same as adding geometry; use Subdivision when the silhouette also needs smoothing.
Materials

Materials

Build and reuse physically based materials, then assign them to objects or selected faces.

What it does. Minder’s material library holds reusable materials and maps them to object slots.

The Minder material editor with library, assignments, base color, textures, metalness, roughness, opacity, alpha, and emission
Captured in Minder 3DThe material editor updates the selected model and exposes the implemented PBR controls.

How to use

  1. Select a mesh and open Material.
  2. Create or choose a library material.
  3. Assign it to the whole object or, in Edit Mode, to selected faces.

Controls

  • Editable properties include name, base color, metalness, roughness, emission color/intensity, and opacity.
  • Duplicate creates an independent library entry; Delete removes an entry when allowed.
  • The active material slot follows the selected object or face group.

Example workflow

  1. Create an orange rough material for a body.
  2. Create a dark glossy material.
  3. Select eye faces and assign the glossy material to selected faces.

Tips

  • Metal surfaces normally need useful lighting/environment reflections to read as metal.
  • Use meaningful names such as Body Orange and Eye Gloss.

Common problems

  • Material edits do not appear in Solid: switch to Rendered; Solid intentionally uses neutral workbench materials.
  • Assign to Faces is unavailable: enter Edit Mode and select faces.

What it does. Image textures and Texture Paint feed surface detail into the active material.

How to use

  1. Create a deliberate UV layout.
  2. Create or import a texture.
  3. Assign it through the material/texture workflow and inspect it in Texture Paint or Rendered view.

Controls

  • Texture Paint creates 256, 512, 1024, or 2048 square color textures.
  • Painted textures can be downloaded as PNG.
  • The paint workspace uses an unlit display so pixels match the texture rather than scene lighting.

Example workflow

  1. Auto UV a mesh.
  2. Create a 1024×1024 base texture.
  3. Paint color, download the PNG, and save the .minder3d project.

Tips

  • Do UV work before detailed painting.
  • Keep the editable project and exported texture together.

Common problems

  • Several faces paint together: the mesh likely had overlapping/default UVs; run Auto UV.
  • Texture looks different in Rendered view: lighting and PBR properties affect the final surface.
UV & Texture

UV & Texture

Cut a 3D surface into 2D islands, organize them, and diagnose overlap before painting.

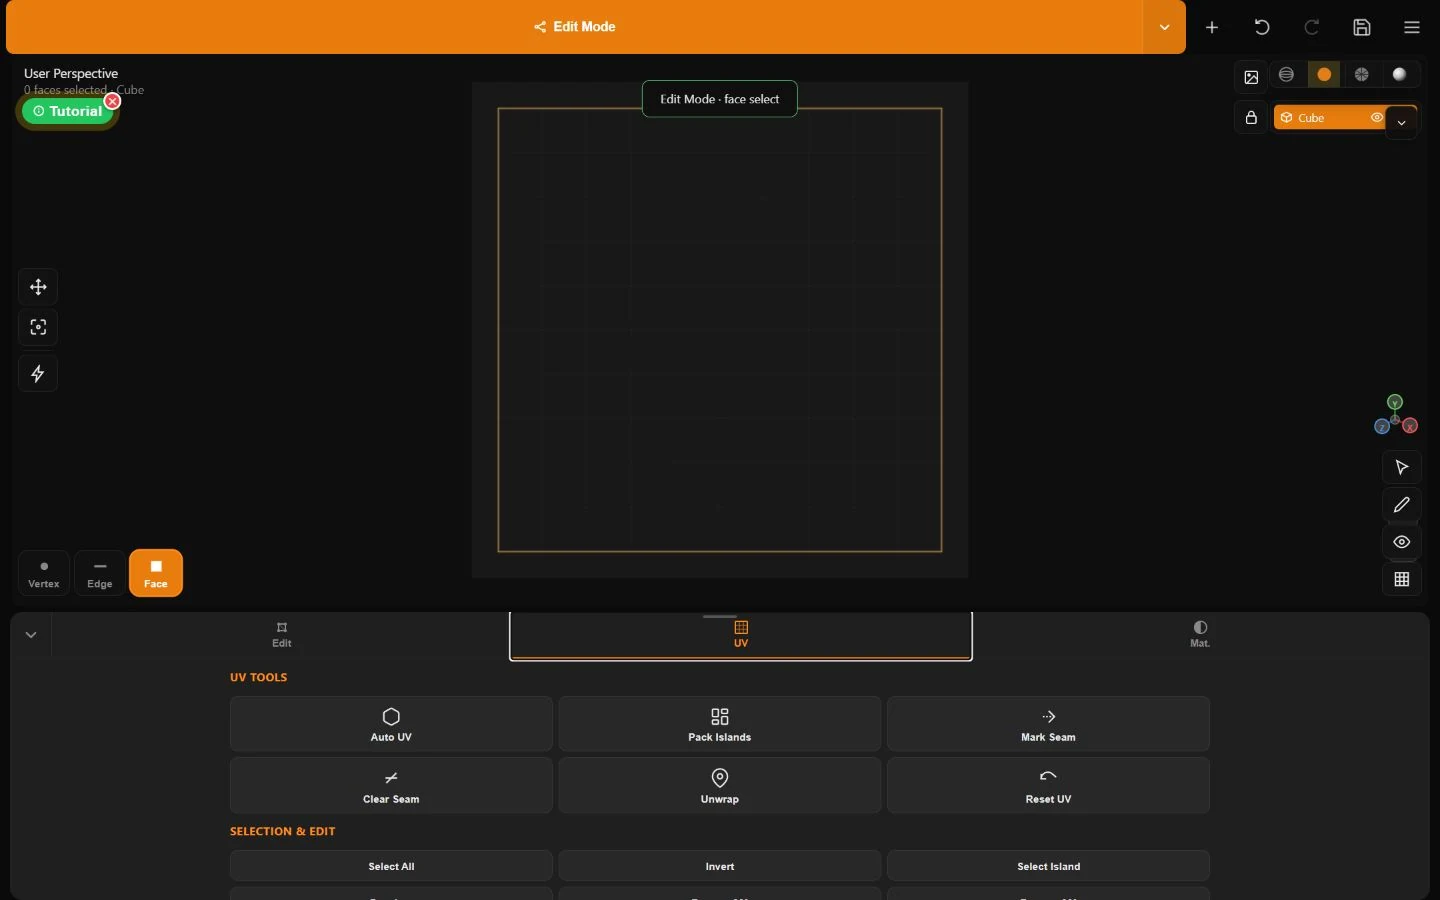
What it does. Auto UV detects seams, unwraps, and packs in one action. Pack Islands rearranges existing islands into texture space.

Minder UV workspace with Auto UV, Pack Islands, seams, unwrap, selection, transform, pin, relax, overlap, and grid controls
Captured in Minder 3DThe UV panel combines automatic setup with manual seam, island, pin, and diagnostic tools.

How to use

  1. Select a mesh and open UV.
  2. Tap Auto UV for a full automatic layout.
  3. Use Pack Islands after manual changes to make the layout fit the 0–1 square.

Controls

  • UV Preview overlays the layout.
  • Show Overlap highlights overlapping faces.
  • Stats report island count, selected elements, pins, overlaps, and out-of-bounds UVs.
  • Grid density choices: 8, 10, 16, or 32.

Example workflow

  1. Auto UV a primitive.
  2. Enable Show Overlap and check that overlaps read zero.
  3. Create the paint texture only after the layout is acceptable.

Tips

  • Auto UV is the safest beginner starting point.
  • Packing changes island position and scale, so do it before detailed painting.

Common problems

  • Auto UV/unwrap fails: inspect mesh topology and try a simpler seam layout.

What it does. Seams mark where the surface may split. Unwrap cuts islands from those seams; Reset UV restores the baseline layout.

How to use

  1. In Edge selection, select one or more edges.
  2. Tap Mark Seam; marked edges appear red.
  3. Tap Unwrap, then Pack Islands. Use Clear Seam to remove selected marks.

Controls

  • Mark Seam only flags edges—it does not unwrap by itself.
  • Live Unwrap recalculates as relevant UV settings change.
  • Reset UV discards the current working layout.

Example workflow

  1. Loop-select a seam around a cylinder plus one vertical edge.
  2. Mark Seam, Unwrap, then Pack Islands.
  3. Inspect overlap and out-of-bounds stats.

Tips

  • Place seams where they will be less visible.
  • Pin important UVs before Relax.

Common problems

  • ‘Unwrap failed safely’: check seams, pins, and topology.
  • One large distorted island: add seams that let the surface open.

What it does. UV edit commands refine selected islands or corners after unwrapping.

How to use

  1. Select UVs with Select All, Invert, Select Island, or Deselect.
  2. Rotate ±90°, Flip U/V, Normalize, or Snap Grid.
  3. Pin important UVs, then Relax to reduce distortion while respecting pins.

Controls

  • Pin / Unpin toggles fixed UVs.
  • Relax uses an LSCM solver.
  • Normalize fits the selection consistently inside UV space.
  • UV zoom controls: in, reset, and out.

Example workflow

  1. Select a label island.
  2. Rotate it 90°, normalize it, and snap a corner to the grid.
  3. Pin the corners and Relax surrounding UVs.

Tips

  • Use Select Island before transforming a whole island.
  • Watch the overlap and out-of-bounds counters after edits.

Common problems

  • ‘UV Relax failed safely’: unpin some UVs or inspect topology.
  • No visible change: verify that a UV selection exists.
Texture Paint

Texture Paint

Create a texture, choose a brush or pixel tool, and paint directly on the mesh.

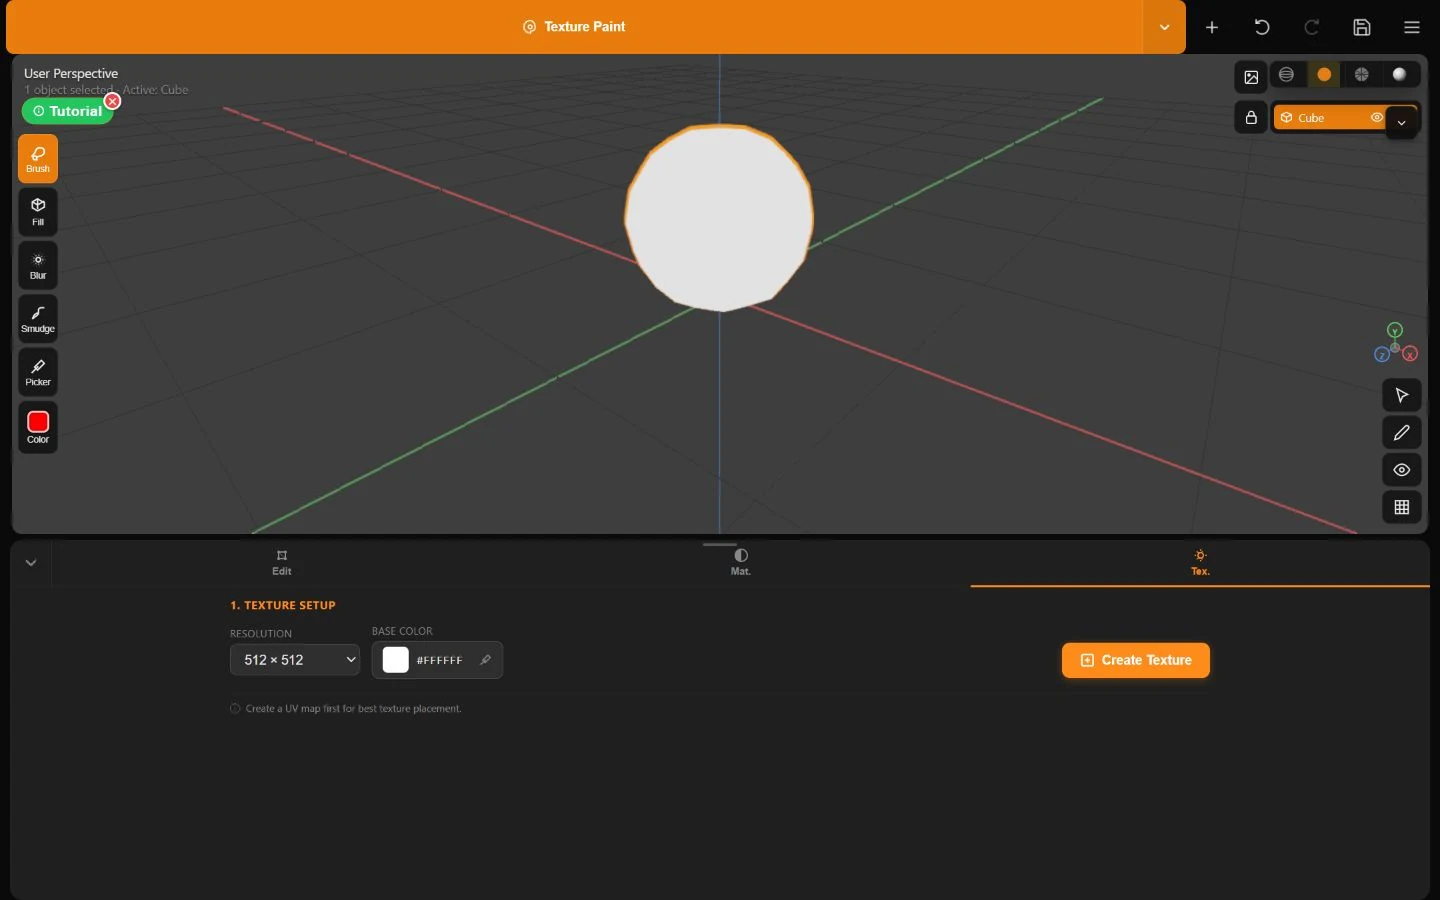
What it does. Texture Paint needs a selected mesh and a deliberate UV map. If none exists, Minder auto-unwraps before texture creation.

Minder Texture Paint setup with resolution, base color, and Create Texture
Captured in Minder 3DTexture creation uses the selected mesh and an explicit square resolution.

How to use

  1. Select a mesh and open Texture.
  2. Choose 256, 512, 1024, or 2048 resolution and a base color.
  3. Tap Create Texture, then enter Texture Paint mode.

Controls

  • Recreate Texture replaces the active texture.
  • Download PNG exports the square texture.
  • Delete removes it.
  • Unlit Active displays exact pixels independent of lights.

Example workflow

  1. Auto UV the model.
  2. Create a 1024 orange texture.
  3. Paint details, download the PNG, and save the project.

Tips

  • Higher resolution holds more detail but uses more memory.
  • Recreating a texture is destructive; download or save first.

Common problems

  • ‘Select a mesh first’: cameras, lights, and groups are not paint targets.
  • Painting appears on multiple faces: fix overlapping UVs.

What it does. Soft, Hard, and Hair presets stamp color with adjustable size, opacity, softness, and spacing.

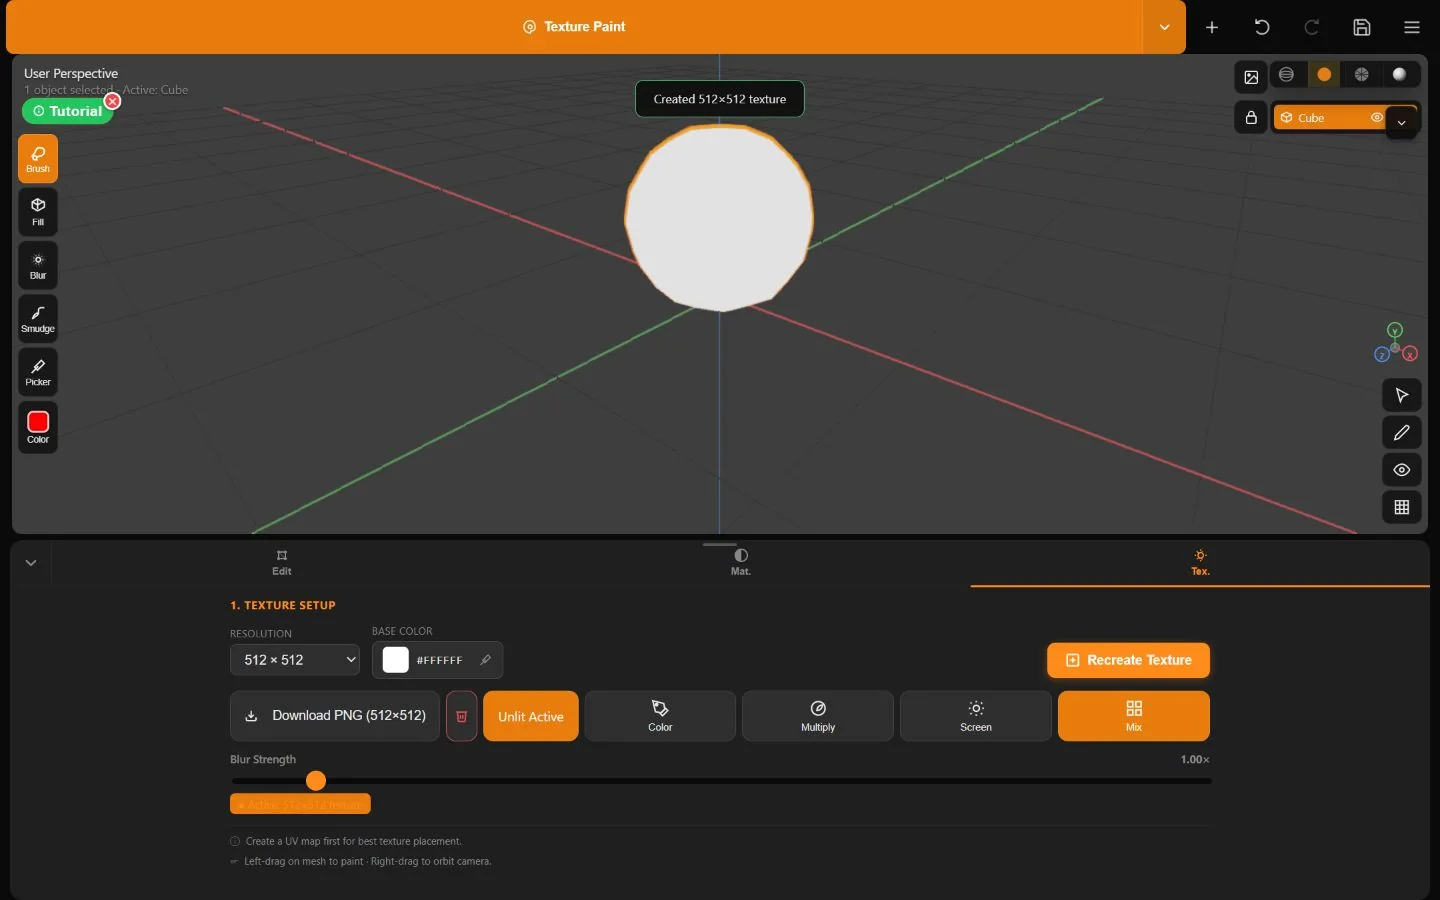
Minder Texture Paint mode showing Brush, Fill, Blur, Smudge, Picker, blend modes, texture download, and active texture
Captured in Minder 3DThe live Texture Paint workspace keeps the viewport, pixel tools, blend modes, and texture management together.

How to use

  1. Tap Brush and choose Soft, Hard, or Hair.
  2. Set Paint Color and adjust Size, Opacity, Softness, and Spacing.
  3. Drag on the mesh to paint.

Controls

  • Blend modes: Color, Multiply, Screen, and Mix.
  • Two-finger pinch while painting changes brush size from 2–200.
  • Right-drag or two-finger navigation reaches the orbit controls.
  • Mirror Seams can continue stamps across mapped seam neighbors.

Example workflow

  1. Use a Soft brush in Mix mode for broad color.
  2. Switch to Hard for clean details.
  3. Use Multiply for shadow accents and Screen for highlights.

Tips

  • Shorter spacing produces a smoother continuous stroke but does more work.
  • Lower opacity and build color gradually.

Common problems

  • Dragging orbits instead of paints: begin directly over the mesh.
  • Jagged strokes: reduce spacing or increase texture resolution.

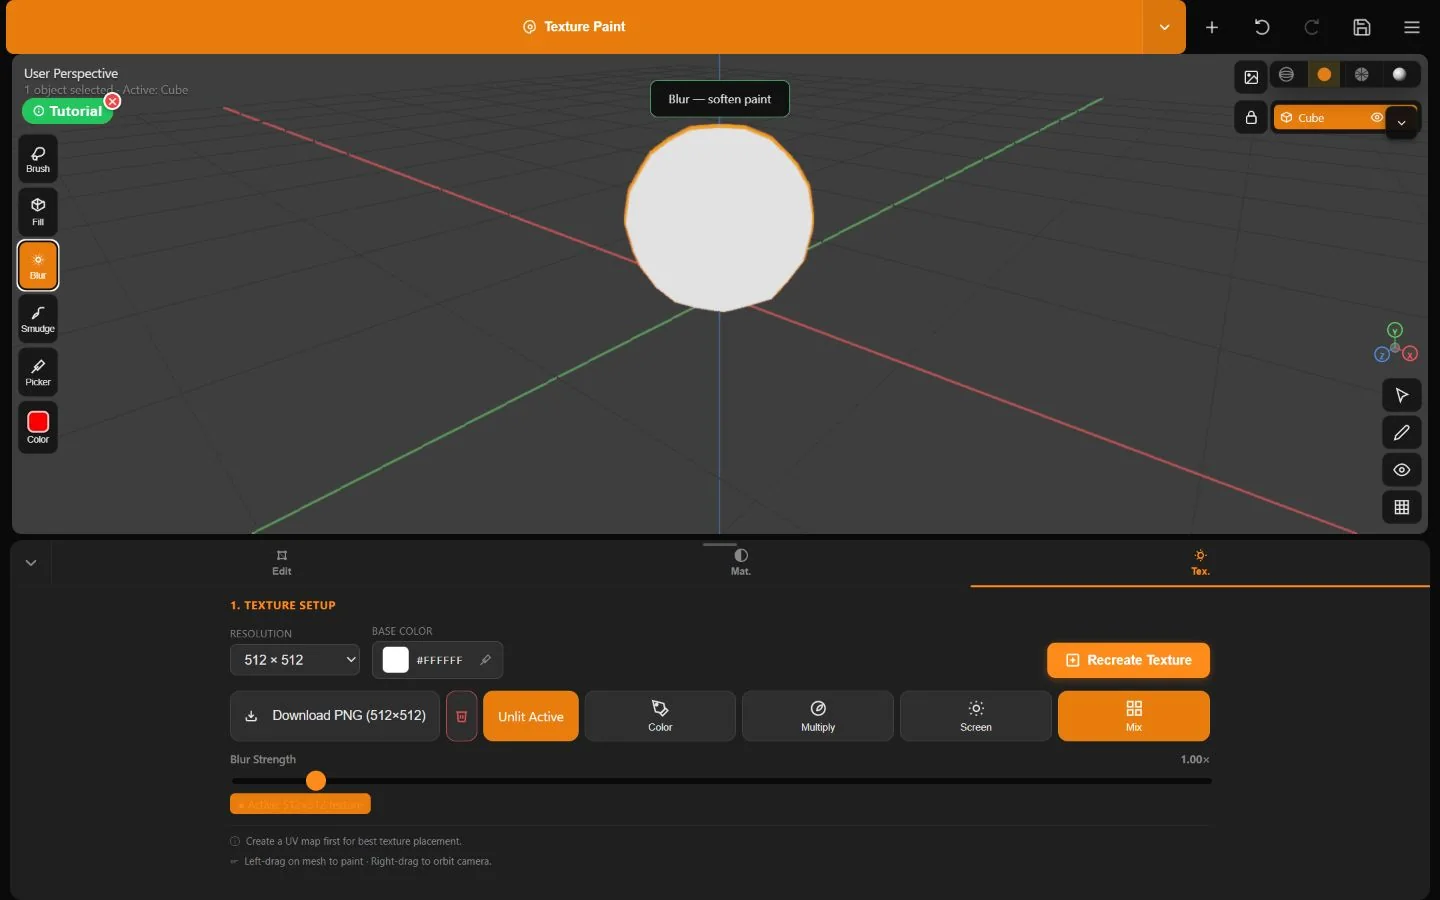
What it does. Special paint tools alter existing pixels rather than laying down a normal brush stroke.

Minder Texture Paint with the Blur tool selected and Blur Strength visible
Captured in Minder 3DBlur is selected in the actual paint toolbar; its strength remains available in the texture panel.

How to use

  1. Choose Fill and tap a region.
  2. Choose Blur and paint over hard pixel transitions; adjust Blur Strength from 0.25× to 10×.
  3. Choose Smudge and drag in the direction pixels should smear.
  4. Choose Picker and tap to sample a color.

Controls

  • Fill flood-fills the connected region under the tap.
  • Picker and Fill are single-tap tools.
  • AO Bake uses the mesh and UVs to add ambient-occlusion information; intensity defaults to 0.8 in the implementation.

Example workflow

  1. Pick an existing body color.
  2. Fill a connected island.
  3. Blur the boundary, then lightly smudge a transition.

Tips

  • Save/download before a broad Fill or AO operation.
  • Use Undo immediately if a fill crosses an unwanted area.

Common problems

  • Fill reaches too far: check UV island connectivity and overlaps.
  • Blur seems weak: increase Blur Strength or repeat the stroke.
Sculpt

Sculpt

Push and redistribute existing vertices with touch-oriented brushes.

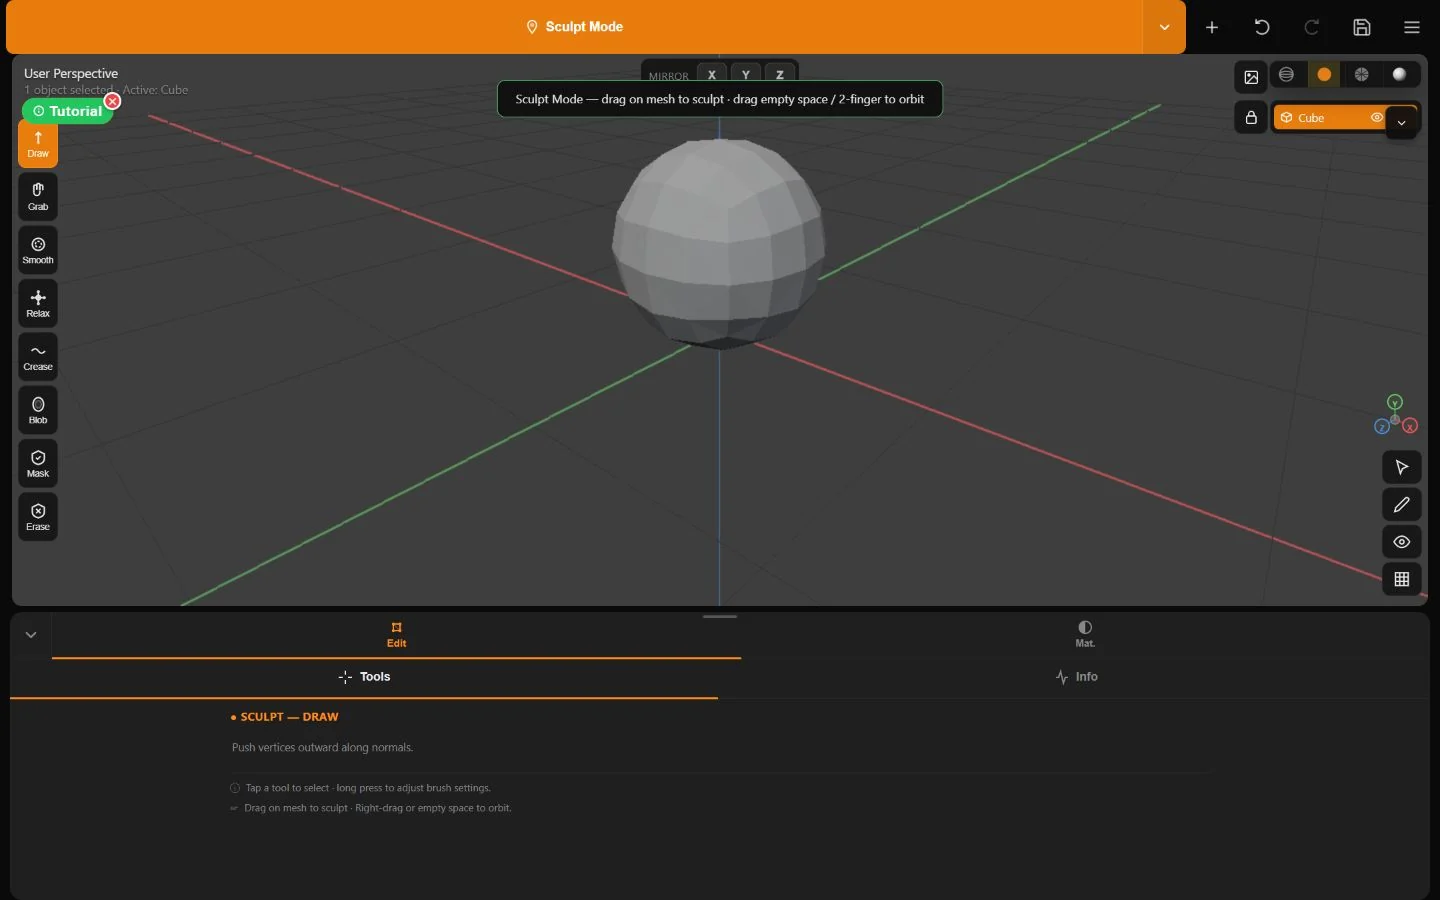
What it does. Sculpt locks a selected mesh as the target and changes its vertices directly.

Minder Sculpt Mode with Draw, Grab, Smooth, Relax, Crease, Blob, Mask, Erase, symmetry, and the active brush description
Captured in Minder 3DThe Sculpt workspace shows the complete implemented brush rail and active-tool guidance.

How to use

  1. Select a mesh and enter Sculpt Mode.
  2. Tap a brush to select it.
  3. Drag on the mesh to sculpt; tap empty space or right-drag/two-finger gesture to navigate.

Controls

  • Brushes: Draw, Grab, Smooth, Relax, Crease, Blob, Mask, and Erase Mask.
  • Long-press a brush for its settings popup.
  • Draw pushes/pulls normals; Grab drags vertices; Smooth averages; Relax evens polygon distribution; Crease dents; Blob inflates.

Example workflow

  1. Add or subdivide a sphere.
  2. Use Grab for the silhouette, Draw/Blob for volume, Crease for definition, then Smooth sparingly.

Tips

  • Sculpt changes existing vertices; subdivide first if the mesh is too coarse.
  • A smaller radius is better for detail after large forms are established.

Common problems

  • Stroke affects too few vertices: increase radius or add topology.
  • The camera moves: begin the stroke over the sculpt target.

What it does. Each sculpt brush stores its own radius, strength, falloff, hardness, spacing, stabilizer, pressure, and filtering options where applicable.

How to use

  1. Long-press the active brush for about half a second.
  2. Adjust the settings shown for that brush.
  3. Enable local X, Y, or Z symmetry from the mirror bar when the model is centered on that axis.

Controls

  • Radius mode: View keeps on-screen size stable; World uses scene units.
  • Front Faces prevents strongly back-facing vertices from being affected.
  • Connected Only restricts the stroke to the hit topology component.
  • Invert reverses direction.
  • Mask protects areas; Erase Mask removes that protection.

Example workflow

  1. Enable X symmetry on a centered head.
  2. Mask the lips, sculpt the cheeks, then erase the mask.
  3. Use Relax with Connected Only to even one component without crossing disconnected pieces.

Tips

  • Symmetry depends on object-local axes and a centered model.
  • Use mask before strong Grab or Blob strokes near finished details.

Common problems

  • Symmetry misses the opposite side: check local axis and object origin.
  • Back-side vertices move: enable Front Faces or Connected Only.
Lighting

Lighting

Use studio/world lighting for a quick setup or add scene lights for deliberate control.

What it does. Viewport shading separates modeling clarity from the final PBR look.

How to use

  1. Use Wireframe or Solid while editing.
  2. Use Solid + Wireframe to inspect topology over shading.
  3. Switch to Rendered to evaluate materials, lights, shadows, bloom, fog, and depth of field.

Controls

  • Solid uses neutral workbench materials and camera-relative lighting.
  • Rendered uses scene/world settings and PBR materials.
  • Matcap is a modeling inspection view when available in the shading controls.

Example workflow

  1. Model in Solid + Wireframe.
  2. Switch to Rendered for material and light decisions.
  3. Return to Solid when heavy post effects slow interaction.

Tips

  • A saved bloom value does not run outside Rendered mode.
  • Rendered quality can be Auto, Low, Medium, High, or Ultra based on device capability and the selected preset.

Common problems

  • Material color looks gray: you are probably in Solid.
  • Rendered mode is slow: lower quality, shadows, SSAO, or post effects.

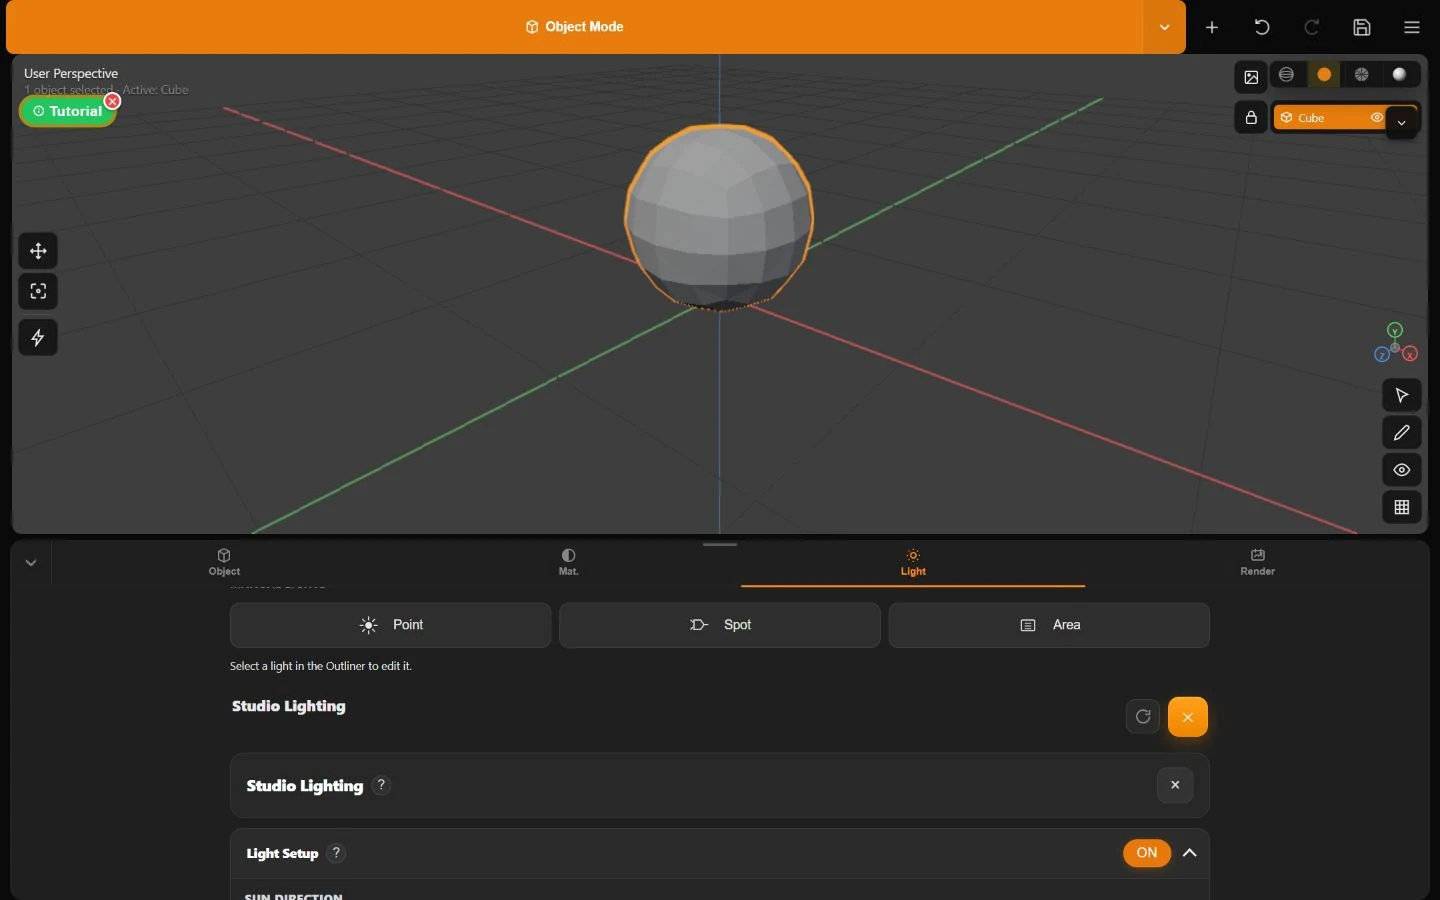
What it does. The built-in rig provides ambient, sun, key, fill, and hemisphere light plus environment and grading controls.

Expanded Minder Studio Lighting settings with sun direction, light strengths, shadows, sky, ambient occlusion, quality, and presentation controls
Captured in Minder 3DThe expanded studio-lighting editor is captured directly from Rendered-capable app controls.

How to use

  1. Switch to Rendered.
  2. Choose a lighting preset or Reset Studio Lighting.
  3. Adjust light direction, environment rotation, exposure, contrast, saturation, sky/background, and shadow settings.

Controls

  • Quick Sun: Direction and Height.
  • Light Direction is Rendered-only.
  • Shadows expose strength, softness, bias, resolution, and distance.
  • SSAO adds contact depth.
  • Bloom responds to emissive materials.
  • Fog can use distance and optional target objects; depth of field can focus by distance or target.

Example workflow

  1. Start with Studio preset.
  2. Rotate the environment until the form reads clearly.
  3. Enable a small bloom only after adding emissive material, then set final exposure.

Tips

  • Adjust lighting before compensating with extreme material roughness.
  • Use shadow bias carefully: too much detaches shadows; too little can create acne.

Common problems

  • Light Direction controls are hidden: switch to Rendered.
  • Bloom does nothing: the scene needs an emissive material with non-black emission and positive intensity.

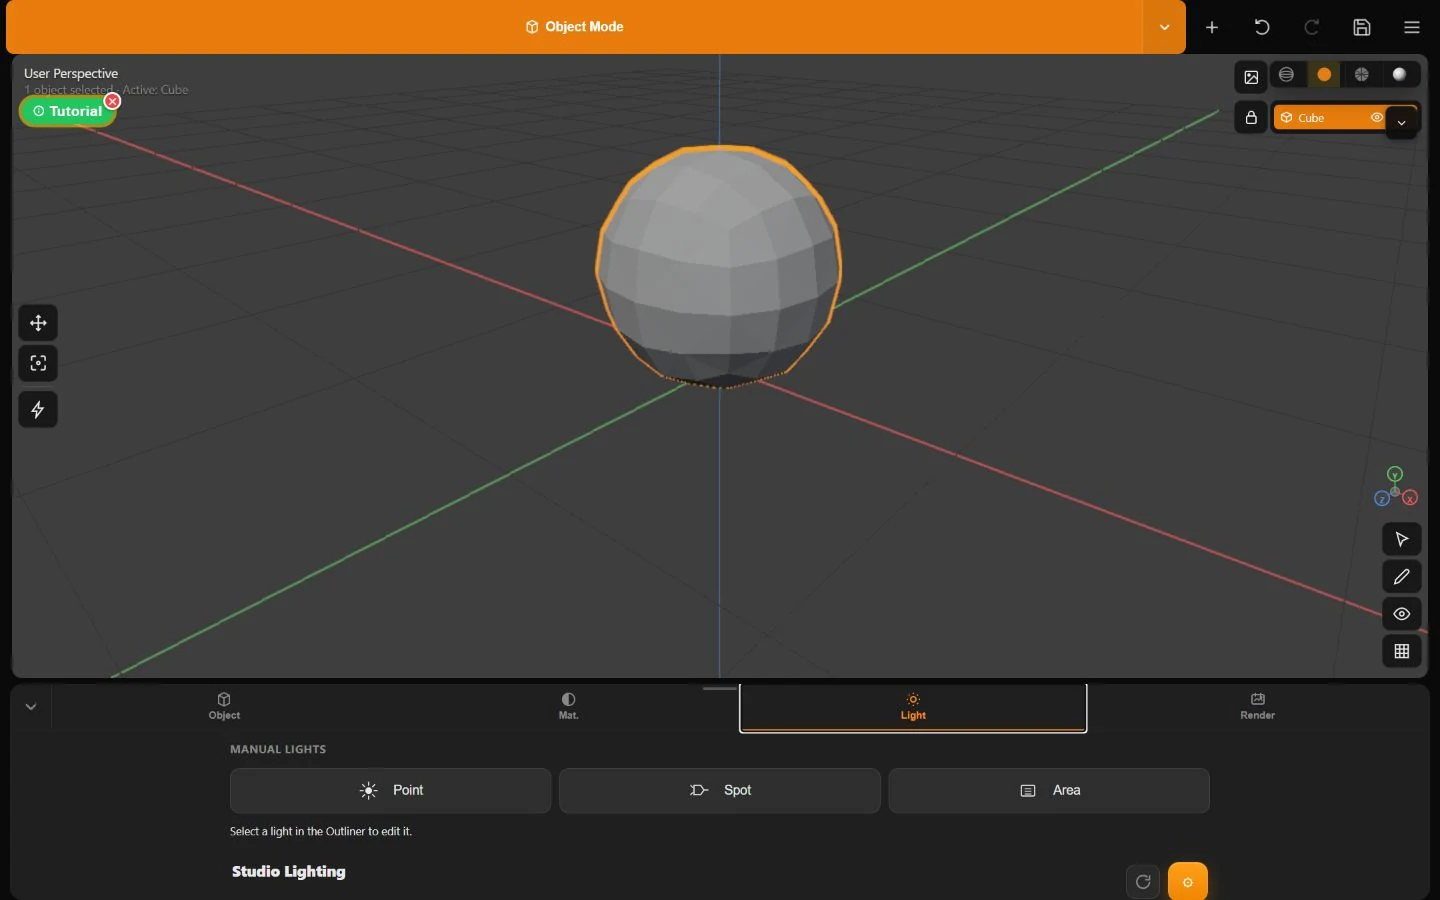
What it does. Manual lights are selectable scene objects with per-light controls and optional object limiting.

Minder lighting panel showing Point, Spot, and Area lights plus studio-lighting controls
Captured in Minder 3DScene lights and the built-in studio rig are separate, complementary lighting systems.

How to use

  1. Add a light from Add.
  2. Select its marker in the viewport or Outliner.
  3. Set color, power, range, and decay; spotlights also expose cone angle and soft edge; area lights expose width and height.

Controls

  • Cast Shadow is available on compatible non-area lights.
  • Limit to Object sends the light only to one selected target.
  • Use Selected links the last non-light object quickly.

Example workflow

  1. Add a warm area key and a cool point fill.
  2. Position them with Move.
  3. Limit a small accent light to one object if the scene needs isolation.

Tips

  • Name lights by job: Key, Fill, Rim.
  • Use fewer purposeful lights before adding many weak ones.

Common problems

  • A limited light has no shadow toggle: object-limited shadows are unavailable.
Camera & View

Camera & View

Editor views help you work; scene cameras define framed output.

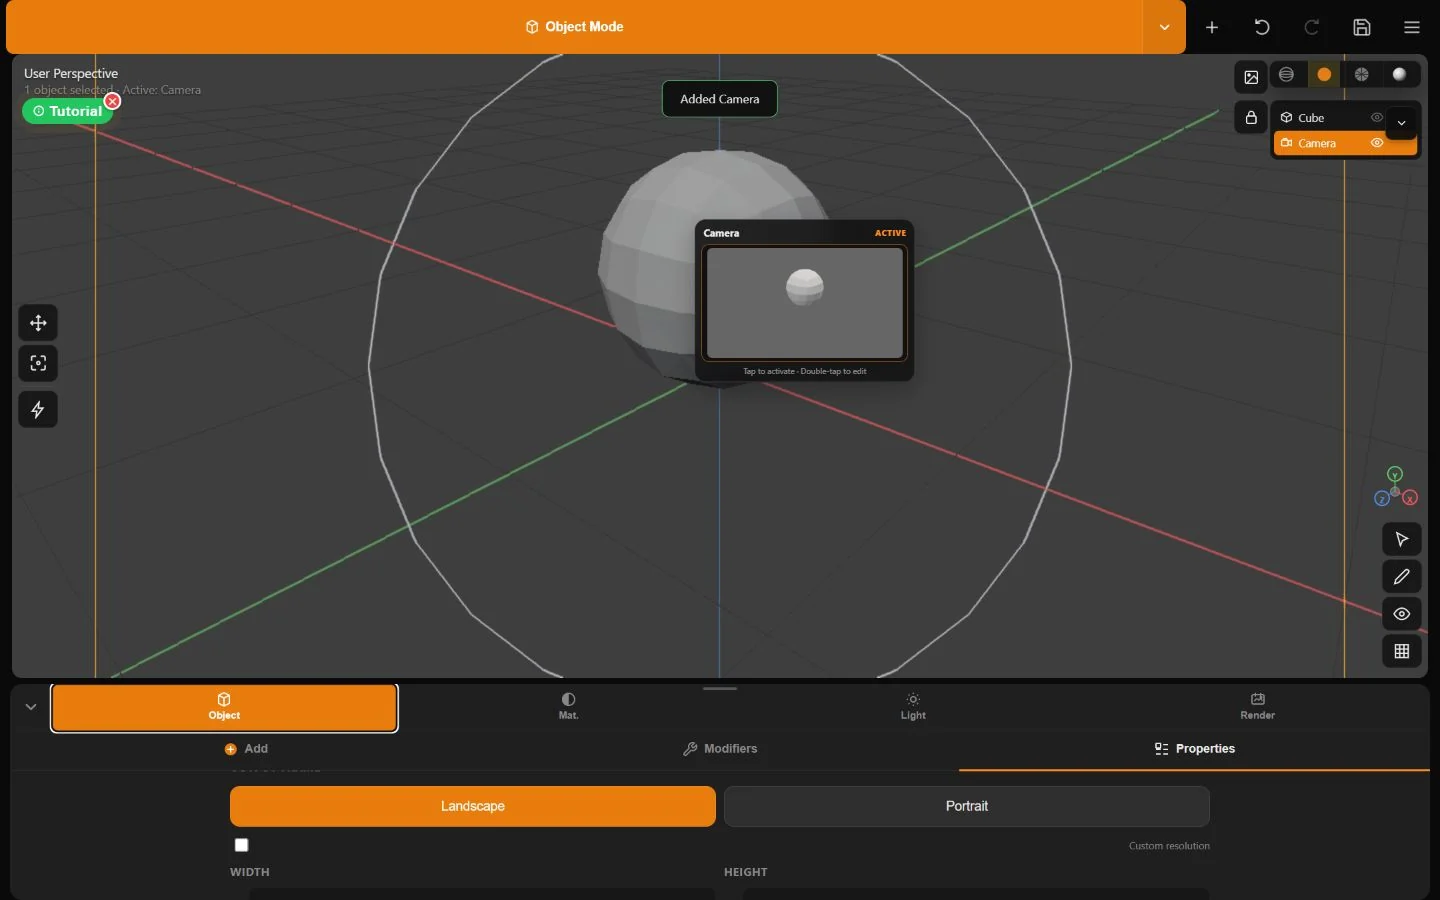
What it does. Minder cameras can be perspective or orthographic and can drive thumbnails, fullscreen camera view, and PNG output.

A selected active Minder camera with live preview, output frame, perspective and orthographic lens controls, clipping, composition, and transforms
Captured in Minder 3DA real active camera drives its preview, fullscreen view, and PNG output dimensions.

How to use

  1. Add Camera and select it.
  2. Tap its thumbnail once to activate it; double-tap to edit its view.
  3. Use Snap Camera to View or camera focus actions to build the composition.

Controls

  • Perspective exposes focal length in millimeters.
  • Orthographic exposes scale.
  • The active camera follows the chosen output frame/aspect.
  • Camera edit supports orbit, pan, dolly, confirm, and Escape/cancel.

Example workflow

  1. Arrange the editor view around your subject.
  2. Add a camera and snap it to the current view.
  3. Set it active, choose 16:9 output, and preview before rendering.

Tips

  • Use a longer focal length for flatter perspective; use orthographic for diagram-like views.
  • The editor view and active camera are separate unless you explicitly sync them.

Common problems

  • Render uses the wrong angle: choose Active Camera as the source and activate the intended camera.
  • Camera thumbnail says TAP TO ACTIVATE: it is not the active output camera.

What it does. Saved views remember editor camera position, rotation, target, and zoom for fast navigation.

How to use

  1. Hold View Lock to open saved-view actions.
  2. Save the current view.
  3. Tap a saved button to restore it; hold that button for its actions.

Controls

  • View Lock freezes the working angle.
  • Saved views are editor navigation aids and do not automatically become scene cameras.

Example workflow

  1. Save Front Detail and Three-quarter views while modeling.
  2. Restore them to check proportions repeatedly.

Tips

  • Create a scene camera when the view must drive a final PNG.
Render

Render

Choose a view, frame, quality, and effects, then export a PNG.

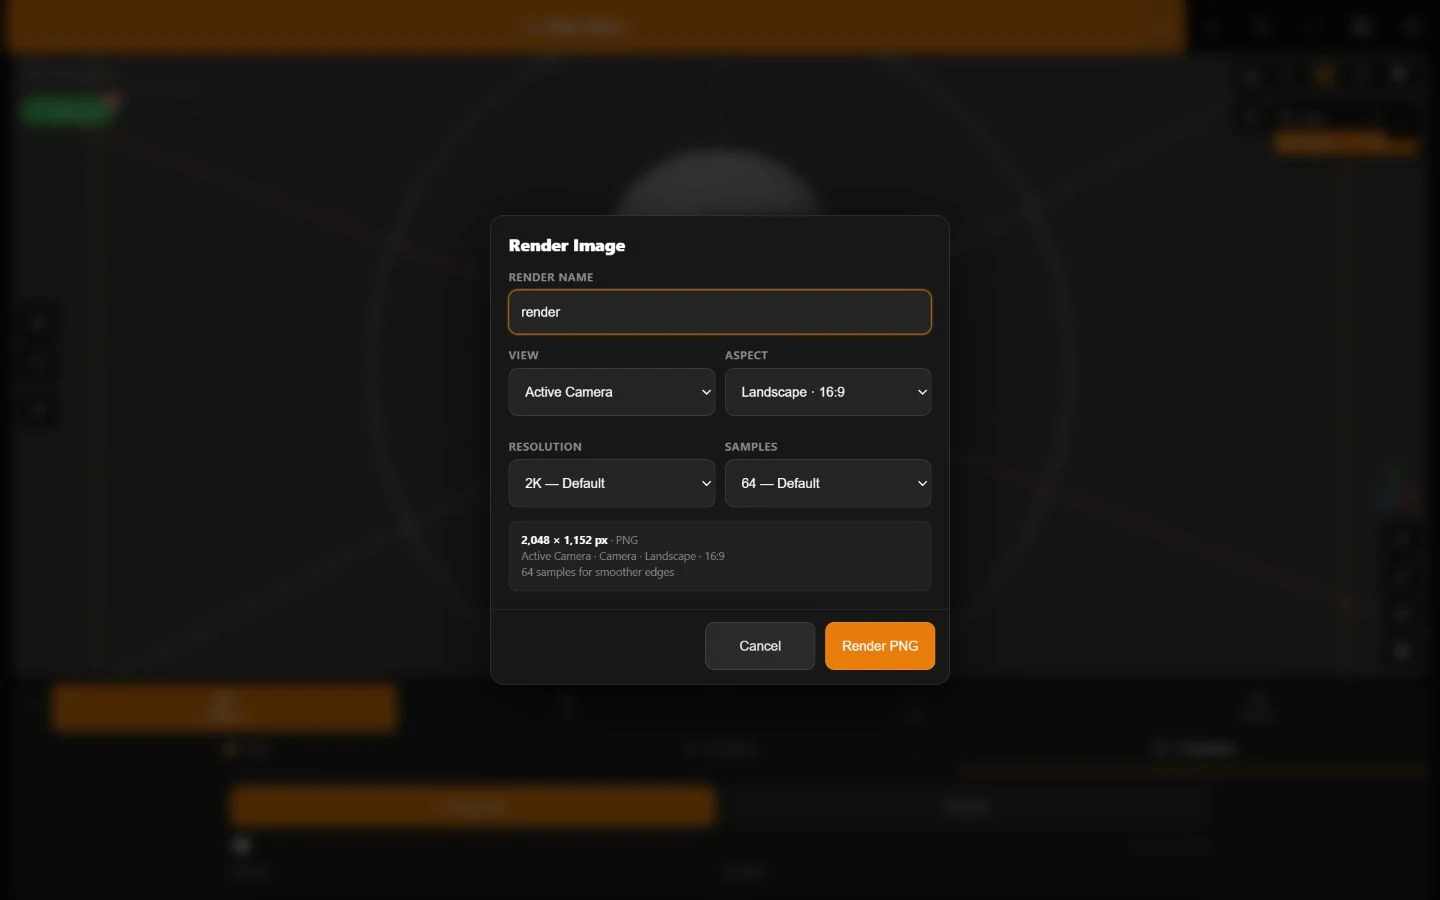
What it does. The render dialog exports the Current View or Active Camera to a named PNG at a chosen aspect, resolution, and sample count.

Minder Render Image dialog showing name, view, aspect, resolution, samples, output dimensions, and Render PNG
Captured in Minder 3DThe final render dialog uses the active camera and reports the exact PNG dimensions before rendering.

How to use

  1. Switch to Rendered and inspect the scene.
  2. Tap Render Image or open Render output.
  3. Choose source, aspect, resolution, samples, and filename, then tap Render PNG.

Controls

  • Source: Current View or Active Camera.
  • Aspect: Landscape 16:9, Portrait 9:16, Square 1:1.
  • Resolution: 1K, 2K, 4K, 8K, or Custom width/height.
  • Samples: 32, 64, 128, 256, 512, or 1024.
  • Output: PNG.

Example workflow

  1. Activate a scene camera.
  2. Choose Landscape 16:9, 2K, and 64 samples for a first final.
  3. Name it chameleon-final and render.

Tips

  • Test at 1K/32 before a costly 8K/1024 render.
  • More samples smooth edges but take longer; resolution controls pixel dimensions.

Common problems

  • Active Camera is unavailable or wrong: create and activate a Minder camera.
  • Blank/slow high-resolution render: lower resolution and samples; mobile GPU memory is finite.

What it does. Rendered effects add focus, atmosphere, glow, contact depth, and reflective response.

How to use

  1. Open Render Effects.
  2. Enable only the effects the image needs.
  3. Preview in Rendered mode, then render a low-cost test PNG.

Controls

  • Depth of field: focus distance or target objects, focus range/margin, and strength.
  • Fog: near/start, far/end, strength, color/background behavior, and optional target mode.
  • Bloom: strength, radius, and threshold for emissive surfaces.
  • SSAO: contact-shadow radius/strength/quality.
  • Planar reflection is evaluated on suitable flat surfaces; PBR reflections use the environment/scene probe.

Example workflow

  1. Focus on the hero object with gentle DOF.
  2. Add light fog behind it.
  3. Use restrained bloom on one emissive accent, then compare with all effects off.

Tips

  • Effects are strongest when composition and lighting already work.
  • Keep fog end greater than fog start.

Common problems

  • DOF preview differs from Solid: it is a Rendered-only effect.
  • Planar reflection does not appear: the surface must be a compatible flat reflective candidate.
Import & Export

Import & Export

Bring supported assets in, preserve editable projects, and choose honest exchange formats.

What it does. Minder accepts static mesh formats, rigged glTF assets, FBX input, image planes, and numbered OBJ sequences.

Minder File menu with native project, OBJ, OBJ Sequence, FBX, and GLB glTF import options
Captured in Minder 3DThese are the import options exposed by Minder 3D 1.0 Beta.

How to use

  1. Open File.
  2. Choose OBJ, OBJ Sequence, FBX, or GLB/glTF and select the main file plus companion textures/MTL when needed.
  3. Read the import summary and inspect the Outliner, materials, and animation panel.

Controls

  • OBJ picker accepts .obj, .mtl, and images.
  • GLB/glTF accepts .glb/.gltf plus images.
  • FBX accepts .fbx plus images.
  • Image planes accept PNG, JPG, or WebP.
  • OBJ Sequence requires at least two numbered .obj files with matching topology; optional MTL/images can accompany them.

Example workflow

  1. Import a GLB character.
  2. Verify material colors and switch to Animation to inspect clips/rig.
  3. Save a native .minder3d copy before editing.

Tips

  • Keep external .gltf textures beside the file when selecting them.
  • For OBJ sequences, use consistent names such as walk_001.obj, walk_002.obj.

Common problems

  • OBJ import failed: include the matching MTL/textures and verify the file.
  • GLTF/GLB or FBX import failed: try a clean export from the source app.
  • OBJ sequence reports incompatible topology/vertex or mesh count: every frame must match exactly.
  • Duplicate OBJ frame: remove repeated frame numbers.

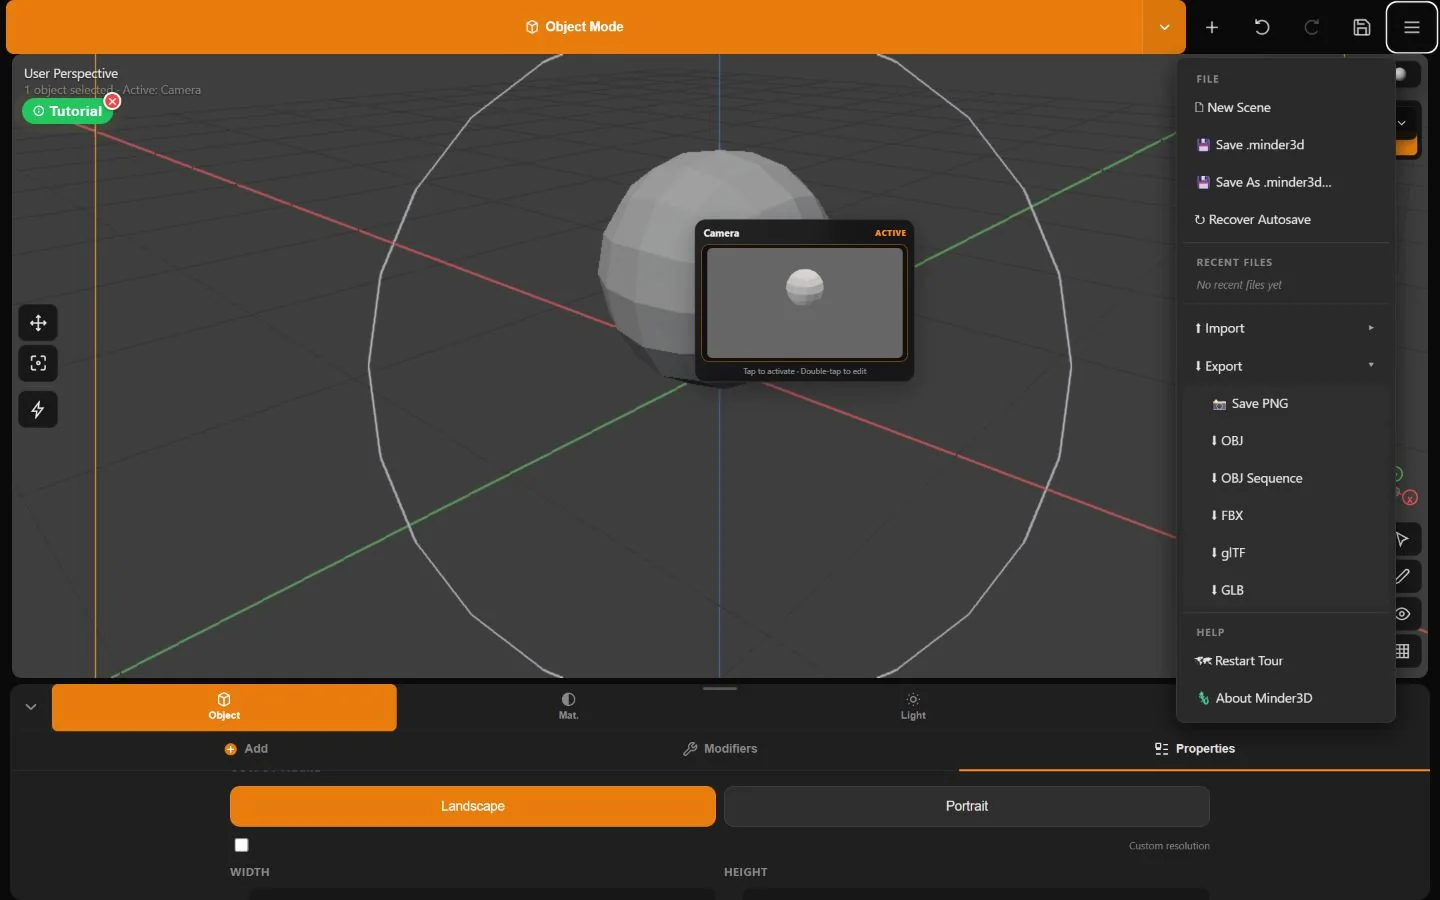
What it does. Choose a format based on whether the receiver needs editability, materials/rigs, static geometry, animation frames, or a final image.

Minder File menu with PNG, OBJ, OBJ Sequence, FBX, glTF, and GLB export entries
Captured in Minder 3DThe export menu includes FBX as an explicit unavailable-information path; the guide documents that limitation.

How to use

  1. Save .minder3d for continued editing in Minder.
  2. Export GLB for a compact scene/rig-friendly exchange file, glTF for JSON-based exchange, OBJ for static geometry, or PNG for a final image.
  3. For an imported OBJ sequence, choose OBJ Sequence export to receive a ZIP.

Controls

  • OBJ export is static geometry and can include Minder polygon preservation logic.
  • GLB/glTF uses the scene exporter and is the recommended alternative when rigs matter.
  • OBJ Sequence ZIP contains one full mesh per frame plus a material library and MINDER_SEQUENCE.txt.

Example workflow

  1. Keep scene.minder3d as the master.
  2. Export scene.glb for another 3D tool.
  3. Render scene-preview.png for review.

Tips

  • Apply or preserve modifiers according to the receiving workflow.
  • Verify exported assets in the destination tool before deleting originals.

Common problems

  • OBJ Sequence export asks for confirmation because files can become very large.
  • FBX export command reports unavailable: choose GLB instead.
Modifiers

Modifiers

Build a non-destructive stack, preview it, then apply only when you want permanent geometry.

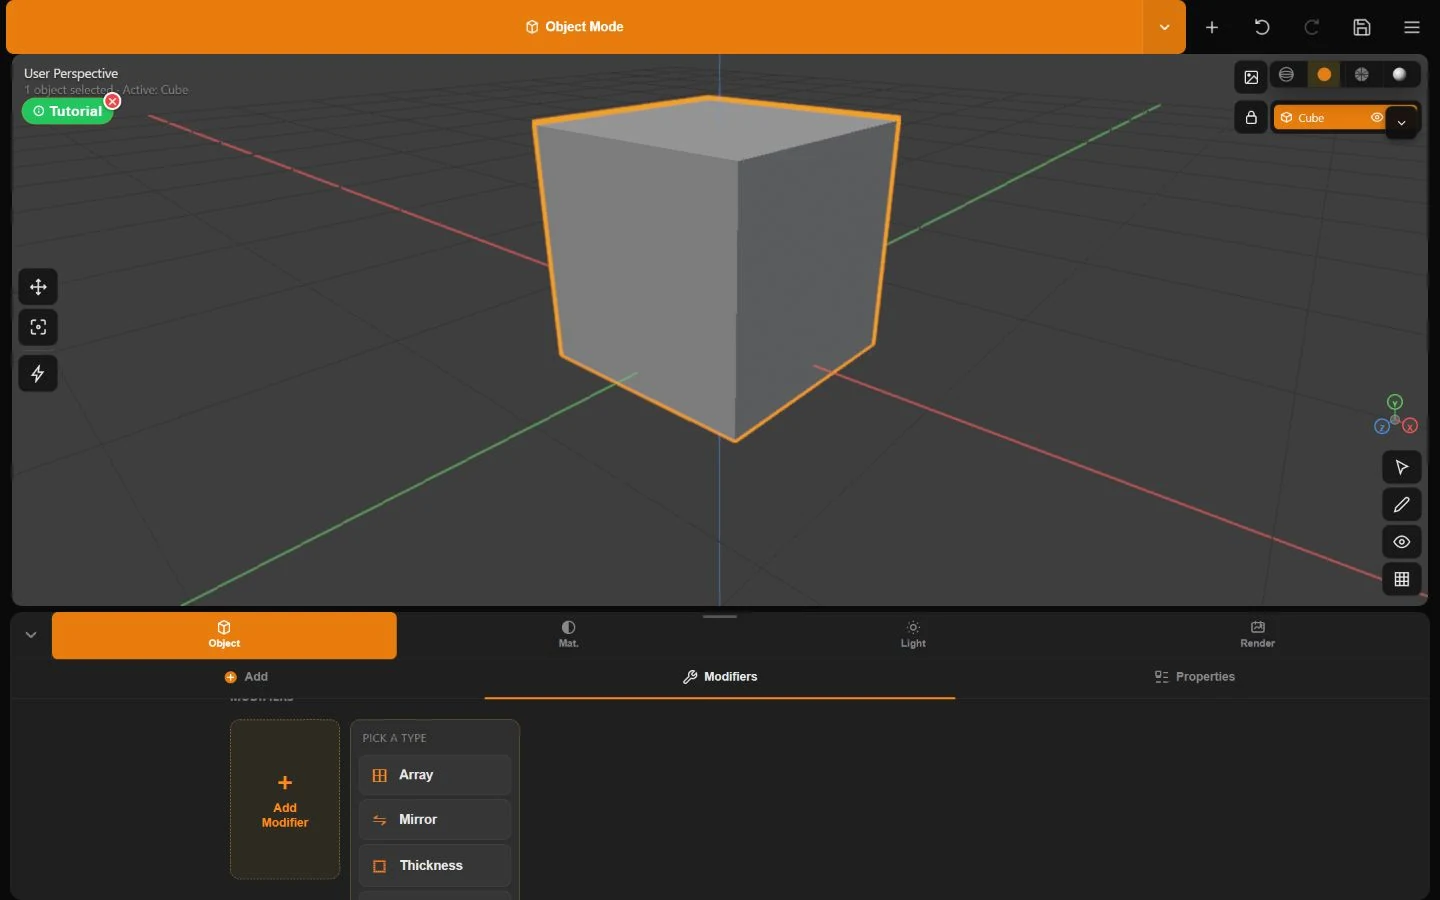
What it does. Each mesh can hold an ordered modifier stack with enable/disable, settings, removal, and Apply.

Minder modifier picker listing Array, Mirror, Thickness, Bevel, Subdivision, Triangulate, Sprinkles, and Scatter
Captured in Minder 3DEvery modifier shown here comes directly from the running app.

How to use

  1. Select a mesh and open Modifiers.
  2. Add a modifier and tune its card.
  3. Toggle it to compare, or Apply to bake the result into geometry.

Controls

  • Array: count and X/Y/Z offsets.
  • Mirror: X, Y, or Z axis.
  • Thickness: shell thickness.
  • Bevel: amount and segments.
  • Subdivision: levels.
  • Triangulate: converts output faces to triangles.

Example workflow

  1. Add Mirror on X to a centered half-model.
  2. Add Subdivision after Mirror.
  3. Add a small Bevel only if the design needs softened hard edges.

Tips

  • Stack order changes results conceptually; review each stage before Apply.
  • Keep modifiers live while experimenting and save before baking.

Common problems

  • Mirror has a gap: vertices are not centered on the local mirror plane.
  • Subdivision is slow: reduce levels or simplify the base mesh.

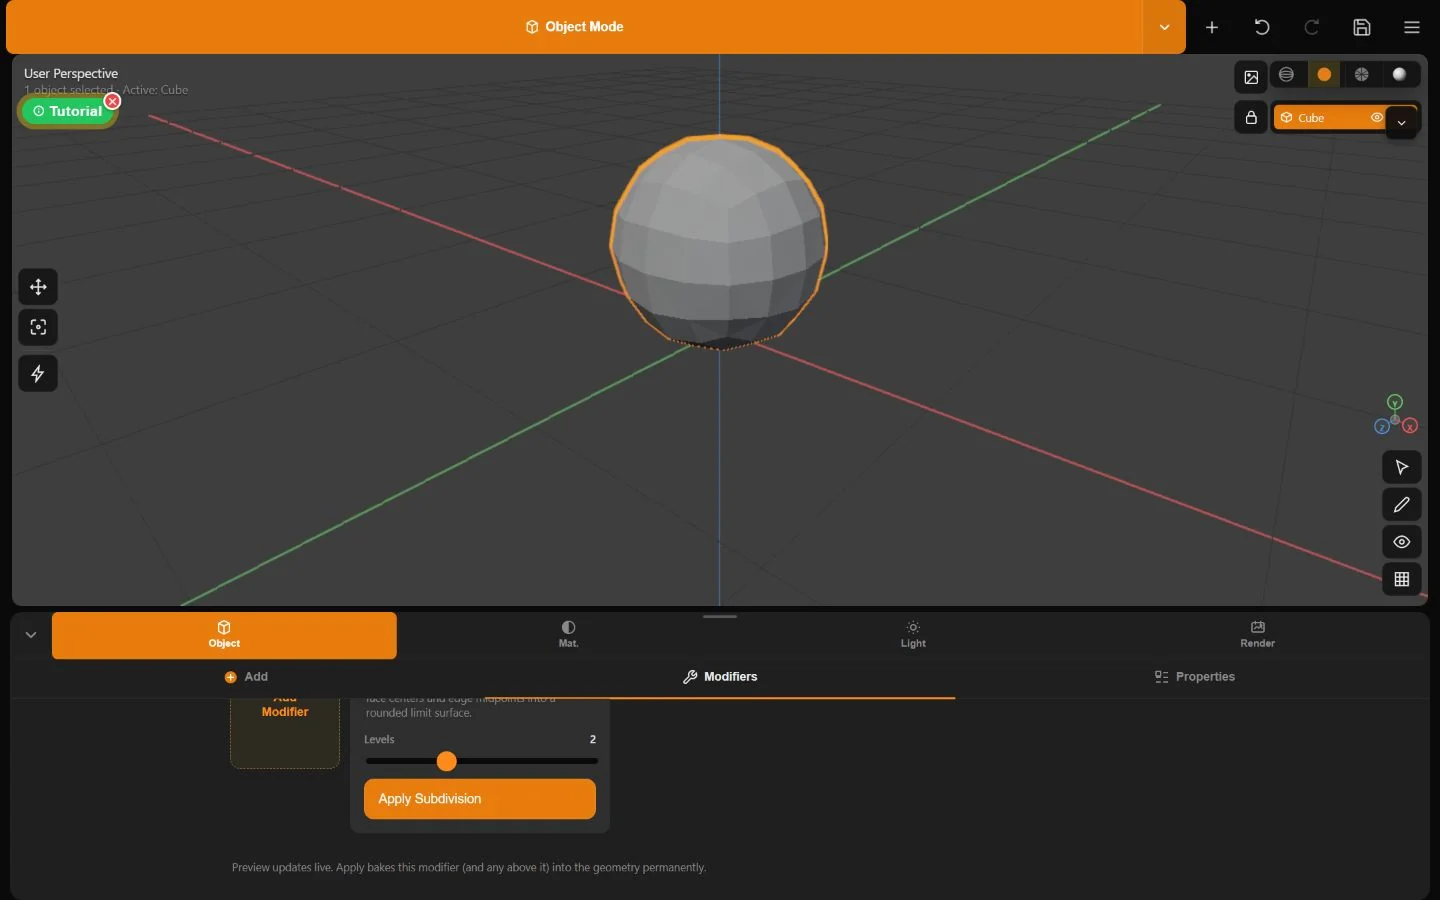
What it does. Procedural surface decoration instances many small pieces over a mesh with seeded randomness.

A live Minder modifier card showing visibility, removal, Levels, Apply, and the non-destructive preview note
Captured in Minder 3DModifier cards provide live preview, visibility, removal, settings, and Apply controls.

How to use

  1. Select a surface mesh and add Sprinkles or Scatter.
  2. Adjust density, seed, scale/randomness, normal alignment, offset, and colors where shown.
  3. Apply only when the procedural result must become geometry.

Controls

  • Sprinkles: density, color count, seed, random rotation, random scale, and surface offset.
  • Scatter: density, seed, scale, random scale, randomness, Align to Normal, surface offset, palette/active colors, and preset.
  • Using the same seed reproduces the distribution.

Example workflow

  1. Model a donut.
  2. Add Scatter with the donut preset.
  3. Tune surface offset so pieces sit on the icing without floating.

Tips

  • Increase density gradually; instances can become expensive.
  • Change the seed to explore layouts without changing the other design choices.

Common problems

  • Pieces point the wrong way: enable Align to Normal.
  • Pieces clip or float: adjust Surface Offset and scale.
Animation

Animation

Play imported clips, create transform animation, and pose supported rigs.

What it does. The Animation panel supports rig, object-transform, and OBJ-sequence controllers with frame ranges and playback.

How to use

  1. Select an animated or rigged object and open Animation.
  2. Choose or create a clip, set FPS/start/end, and move the playhead.
  3. Insert keys manually or enable Auto Key, then play and review.

Controls

  • Playback: play/stop, previous/next frame, loop.
  • Keys: all transforms, delete, copy, paste, duplicate, move left/right, select all.
  • Interpolation: Hold, Linear, or Smooth.
  • Timeline zoom: 0.5×–4×.
  • OBJ sequences play one full mesh per numbered frame.

Example workflow

  1. Create an object clip.
  2. At frame 0 insert transforms.
  3. Move to frame 30, rotate the object, insert/auto-key, and play with Smooth interpolation.

Tips

  • Turn Auto Key off after recording to avoid accidental keys.
  • Use GLB/glTF when exchanging rigs and clips.

Common problems

  • Animation panel is empty: select an object with a registered animation controller or create an object clip.
  • Imported OBJ sequence will not show bones because the format contains none.

What it does. Rigged glTF assets can expose bone selection, transform keys, rest/bind pose operations, mirroring, and bone display controls.

How to use

  1. Select a rigged asset and enter Pose Mode.
  2. Select a bone, choose Move/Rotate/Scale, and transform it.
  3. Store keys with Auto Key or Key All Transforms; exit Pose Mode when finished.

Controls

  • Bone tools include copy/paste transform, reset, mirror selected pose, rest-pose toggle, bone visibility, and X-ray.
  • Reset Bind Pose restores the captured rig bind pose.
  • All Bone Tracks shows channels beyond the current bone.

Example workflow

  1. Pose one arm at frame 0.
  2. Move to frame 20 and pose it differently.
  3. Mirror the selected pose where naming supports left/right matching, then play.

Tips

  • Save before editing an imported production rig.
  • Use explicit left/right bone naming for predictable mirroring.

Common problems

  • Pose Mode is unavailable: the selected asset has no registered skeleton/rig.
  • Bone is hard to select: enable bone visibility and X-ray.
Tutorial

Tutorial

Use the built-in guided donut project to learn the core workflow in context.

What it does. The in-app tutorial walks through adding and shaping a torus, materials, modifiers, scene presentation, and saving/sharing.

The built-in Minder tutorial running inside the actual workspace with a highlighted step
Captured in Minder 3DMinder’s built-in 38-step tutorial guides actions in the live workspace.

How to use

  1. Tap Tutorial and follow the highlighted control for each step.
  2. Use the supplied actions when a step asks you to create, reshape, assign, or apply.
  3. Dismiss at any time; reopen Tutorial when you want to continue.

Controls

  • The tutorial recognizes the expected object/material/modifier state instead of relying only on button clicks.
  • Its workflow uses torus radii, material assignment, smoothing/subdivision, thickness, lighting/render, and File actions.

Example workflow

  1. Create the base donut.
  2. Adjust torus proportions, add the intended materials, and refine with modifiers.
  3. Switch to Rendered, compose the result, save .minder3d, and export a shareable file/image.

Tips

  • Let each highlighted step complete before improvising.
  • If a step does not advance, compare the requested selection, mode, and property value.

Common problems

  • Tutorial target is missing: return to the expected mode and select the donut object.
  • A later step fails after manual changes: Undo or restart with a clean tutorial object.
Troubleshooting

Troubleshooting

Start with selection, mode, topology, device load, and format compatibility—the five most common causes.

What it does. Most tools are contextual: they require a particular object type, mode, and element selection.

How to use

  1. Read the current mode at the top.
  2. Select a compatible mesh in the viewport or Outliner.
  3. For Edit tools, choose Vertex/Edge/Face and make a valid selection; for Material/Texture/Sculpt, select a mesh.

Controls

  • Disabled buttons indicate missing context.
  • Viewport hints and toasts state required selections such as ‘Tap a face first’ or ‘Select a mesh first’.

Example workflow

  1. If Extrude does nothing, enter Edit Mode, choose Face, select a face, then launch Extrude.

Tips

  • Use Undo rather than stacking repeated clicks when feedback is unclear.

Common problems

  • Selection outline absent: tap the object again or use the Outliner.
  • Panel empty: active object may be a camera/light/helper rather than a mesh.

What it does. Geometry count, texture size, modifiers, shadows, post effects, and output size all compete for browser and GPU memory.

How to use

  1. Switch to Solid and lower Render Quality.
  2. Disable or reduce SSAO, shadows, bloom, DOF, fog, Subdivision levels, scatter density, and paint resolution.
  3. Test PNG output at 1K and 32 samples before increasing quality.

Controls

  • Auto quality considers device memory and CPU cores.
  • Viewport pixel ratio, shadow resolution, and SSAO are quality-scaled.
  • 8K output and 1024 samples are the most demanding choices.

Example workflow

  1. Pause heavy effects while modeling.
  2. Make a 1K proof render.
  3. Increase one setting at a time for the final.

Tips

  • Close other GPU-heavy tabs on mobile.
  • Save the project before a long render or dense modifier apply.

Common problems

  • Browser tab reloads during render: reduce resolution, samples, and texture sizes.
  • Sculpt is uneven: use a suitably subdivided—but not excessive—mesh.

What it does. File errors usually come from missing companions, invalid project data, unsupported exchange features, or browser resource limits.

How to use

  1. Confirm the extension and select companion MTL/images for OBJ or images for external glTF.
  2. For OBJ sequences, verify numbering and identical topology.
  3. When FBX export is requested, use GLB instead.

Controls

  • Supported import: .minder3d/.mender, OBJ/MTL, numbered OBJ sequences, GLB/glTF, FBX, and PNG/JPG/WebP image planes.
  • Supported export: .minder3d, OBJ, OBJ-sequence ZIP, GLB, glTF, paint/render PNG.

Example workflow

  1. Re-export a failing source asset as GLB from its authoring tool.
  2. Import it into a clean Minder scene.
  3. Check materials, bones, clips, and scale before merging it into the working project.

Tips

  • Modern Chromium-based browsers generally offer the most complete file-handle behavior; download-based Save As remains the portable fallback.
  • Never treat a successful import as proof of a perfect round trip—test the exported result.

Common problems

  • ‘Not a valid Minder3D project’: open the original native file, not an exchange export renamed to .minder3d.
  • FBX export unavailable: this is an explicit format limitation, not a temporary button failure.